Thursday, 27 June 2013

A mercy mission

Next door's cat has taken to stalking birds. Dave intervened to get him to drop a young thrush on Saturday. Once the cat had been forced to retreat, we stepped in to see what we could do for the poor bird, but alas it was very young, in severe shock and sadly, it died.

Imagine our surprise on Sunday when our neighbours knocked on the door to report their cat had done it again. There was a bird in their kitchen and they expected Dave to do something about it!

Dave (bless him), tried to pass the responsibility back to them by handing them a shoe box.

A few minutes later, they knocked again and gave the shoe box back, complete with a bird inside.

I'm not sure when it became our responsibility to take care of baby birds brought in by their cat, but when faced with someone thrusting a hurt bird at you, it is hard to know how to react. So it was, we acquired our second bird in less than 24 hours courtesy of the neighbour's cat.

This one looked ruffled, missing a few feathers and appeared to be a bit stunned, but was older so we hoped it might be OK. We made a tentative identification as a chiffchaff and then put it in a covered cat carrier with some drinking water and waited to see if it would perk up.

A couple of hours later, it looked considerably brighter, was responding to our presence and trying to perch. Heartened that it might survive, we checked again, posted a pic on a Facebook wildlife page and discovered this was a blackcap.

Young blackcap, found in our neighbour's kitchen

We added some twigs and blueberries, then had the dilemma of what to do with it. Wild birds are just that, wild... And we had no desire to keep one captive, not to mention that having two cats of our own, our house would undoubtedly be a stressful environment for our unexpected guest.

We've taken wild animals to the PDSA and RSPCA before, but not been happy as we're fairly sure they've been euthanased, so we decided to look for a local wildlife sanctuary. Our first thought was to call Brandon Marsh to ask for advice, but it being Sunday, no one answered the phone, hence we took to the internet and found the Nuneaton and Warwickshire Wildlife Sanctuary.

We sent them an email, then Dave tried the phone and was surprised when someone answered. Even better, yes they were happy to take the suspected Blackcap. Cue a Sunday evening dash to Nuneaton, with M in tow because she insisted she wanted to come too.

We got lost. Horribly lost in that I knew exactly where we were and where we wanted to go, but had no idea how to get there as we were trapped inside Nuneaton's one way system! M was being very patient and singing to the bird (after I explained that I wouldn't put a CD on in case it frightened the bird), her song of choice being Soldier, Soldier. M kept asking if we'd reached Nuneaton yet so I said we were there, but I was a bit lost and I was trying to get us to the wildlife sanctuary. M offered the eminently sensible suggestion that we should go home.

In the end, by pure cunning and stubborn determination I ended up on the correct bit of one way street heading towards the wildlife sanctuary which is based in an unassuming bungalow. Once there, we got the bird out of the car, still in its improvised cage and headed inside (with me hoping they hadn't had a call out in the time it had taken us to get there).

Fortunately, someone came when I rang the bell and in we went to immediately encounter a young deer blocking our path. It was quite literally standing there, being nosy and forcing us to walk around it so it could get a good look at us. M was shorter than the fawn so asked (not unreasonably) if it was a horse. We were shown into a shed where a young fox sat watching in a puppy cage where it apparently sleeps. The shed floor was very springy, so bouncing expert that she is, M started vigorously jumping up and down.

I scooped the excited small person up before she frightened the fox and showed her 'our' bird which was briefly examined before being whisked away to the reptile shed where it is nice and warm. Apparently they had several fledglings there so it would have company while it recovered. M was very concerned that the bird had been taken, but was finally reassured that it was in the best place and that this was an animal hospital. I carefully explained that normally, if we found a baby bird we'd take it back to its mummy and daddy, but since the cat didn't tell us where he found the bird we couldn't do this. That was why we'd brought the bird to a animal hospital and they'd look after it now.

Satisfied M nodded and said she'd like to play. There was a bit of consternation when M asked where the swings were but I pointed out the garden was full of sheds so had no room for a swing, plus it was very late, Daddy would wonder where we were and we had to go home. Which is exactly what we did...

Mission accomplished and I now know where the Nuneaton wildlife sanctuary is although I can't guarantee I wouldn't have similar problems navigating my way there again. Personally though, next time the neighbour's cat brings in a live bird, I intend to hand over their contact details along with a shoebox!


Friday, 14 June 2013

What shall we sing?

We made a song or story board.

For those who do not know what a song board is, it is a felt board to which you attach pictures to help lead you in a song or story session. It can be a useful tool with small children for focusing attention or choosing which songs to sing, particularly if you have several children to engage with.

In our house of course, we only have one small person, but M does love singing and always has. We sing a lot in our house as will as when out and about -- yes, I am the mother who will walk down the street hand in hand with my daughter belting out some nursery rhyme or other. M loves making up songs about her favourite books/toys/what she is up to (or getting us to), which can make keeping up with her musical needs challenging, but we do our best. Not too surprisingly, M also enjoys the singing aspect of Rhyme Time at the library or various parent/toddler groups we've tried and so we thought we'd bring that into our home.

The first thing I needed was a board.

We used an off cut piece of mounting card,which is usually used for framing photographs. It was fairly heavy weight cardboard so unlikely to bend accidentally, but being approx A3 sized wasn't too big for M (who is nearly three) to carry.

I covered the board in felt, blue on one side and green on the other.

Having never worked with crafting felt before, I'd assumed it was pretty much all the same. I was wrong. Felt can vary a lot in thickness and 'hand' or how it feels when you touch it.

The first lot of felt I bought on the internet was quite frankly rubbish. It was stiff, not very fluffy and thin. It was described as being suitable for craft and board covering, which to me meant it should be ideal for what I had in mind, but apparently not. I ended up using it as a base layer and then covering it with more expensive felt I'd bought from our local market. The advantage of the market was I could feel the felt, assess it for fluff and thickness and check it wasn't going to crease like paper if M picked it up or tear on its first contact with velcro!

This was very much a joint project with M, so we used PVA to glue the felt to the board, I trimmed it and then we added a second layer of felt to the first. We used pegs to hold the felt in place whilst it dried, then once it was done I trimmed it again and we stuck down the edges with heavy duty double sided sticky tape.

M applies PVA for a second layer of felt.

All pegged down and left to dry...

To finish, I added some fabric tape to cover up the rough edges.

It is not as neat as it could be, but I was making it up as I went along and acting in a fast, decisive fashion is essential when you're being assisted by a nearly three year old who might otherwise take matters into her own hands!

Once the board was complete M and I compiled a list of songs we'd like to sing. Once we had a few, I drew pictures which might represent those songs with the exception of a suitable guardsman for 'The Grand Old Duke of York' or 'Soldier, Soldier' where I faced a mental blank so Dave stepped in.

I cut the pictures out and stuck them onto cardboard. In our case, I reused empty cereal boxes and for my first batch used PVA to glue them down.

PVA turned out to be a mistake, water based glue and non-permanent marker just don't mix well with the ink on the paper running quite badly, hence for my second batch I used good old glue stick. Ideally, I think I'd laminate the pictures to make them wipe clean and durable, but I do not have a laminator and to be honest, when the pictures wear out we'll just make some more which will be fun.

Pictures glued to cardboard - PVA is a bad choice!

I re-inked the pictures then cut them out before passing them to M who coloured them in. Once she was done, M stuck the hook part of velcro dots to the back of each picture and stuck it on the board.


Finished song board, complete with first batch of pictures to choose from.
At last - a song board or as M says, a choosing board.

What shall we sing when we sing together?
Would you like to choose?

For the uninitiated, the idea is to take turns in choosing a song. Everyone sings the choosing song and then one person (or toy in our case) chooses a picture from the board. The board is turned over and the picture is stuck on the back. The person who chose then tells everyone what song they'd like to sing as represented by the picture. There are no hard and fast rules tying picture to song, providing the chooser knows the song and can loosely associate it with the picture, all is good.


Sunday, 2 June 2013

A tiny bit of crochet

There is actual crochet happening here. Or rather it did, briefly...

Motif for Betty shrug

This is the first motif for Betty (Ravelry Link) from Vintage Crochet, which I bought a few years back when I was easily won over by the pretty pictures and it sure is a pretty book.

The secret to making this motif was to go to a park with a picnic, then to hand over toddler chasing duty to Dave for half an hour whilst I grappled with the pattern.

As it happened, once I got the thing made I decided I didn't like it.

If you look at the joins between rounds in the bottom left corner, you may be able to see they are a bit 'clumsy' and look crowded. Blocking may sort this out, but if I manage to finish this garment it and if I intend to wear it, I'll not be blocking every time I wash it!

So... I reworked the troublesome join on the 4th round, replacing the 2ch tr into the first dc with a single ch and a dtr.

Corrected join on round 4

Much better!

OK, it may not look that much different, but I  can see the difference and if I'd left it, it would have annoyed me every time I looked at the piece.


Thursday, 4 April 2013

Easter outings in the cold

We’ve had an enjoyable and somewhat packed Easter this year, as we endeavoured to do something despite the freezing weather... For us, as always the challenge was to find suitable days out which held something for us adults and M alike, preferably not too exposed to the elements given that the temperatures have struggled to get more than a degree or two above freezing!

Being Coventry based, we headed to the Transport Museum on Saturday bundled up against persistent snow flurries that swirled around us as we walked along. M isn’t a huge fan of Coventry’s Transport Museum, since the exhibits tend to be for looking at only with no touching. M is more of a hands on kind of a girl, so finds it inexplicable that you should have all these interesting vehicles behind rope barriers and she (nor us) are allowed to climb aboard, sit in them or fiddle with them to our collective hearts content.

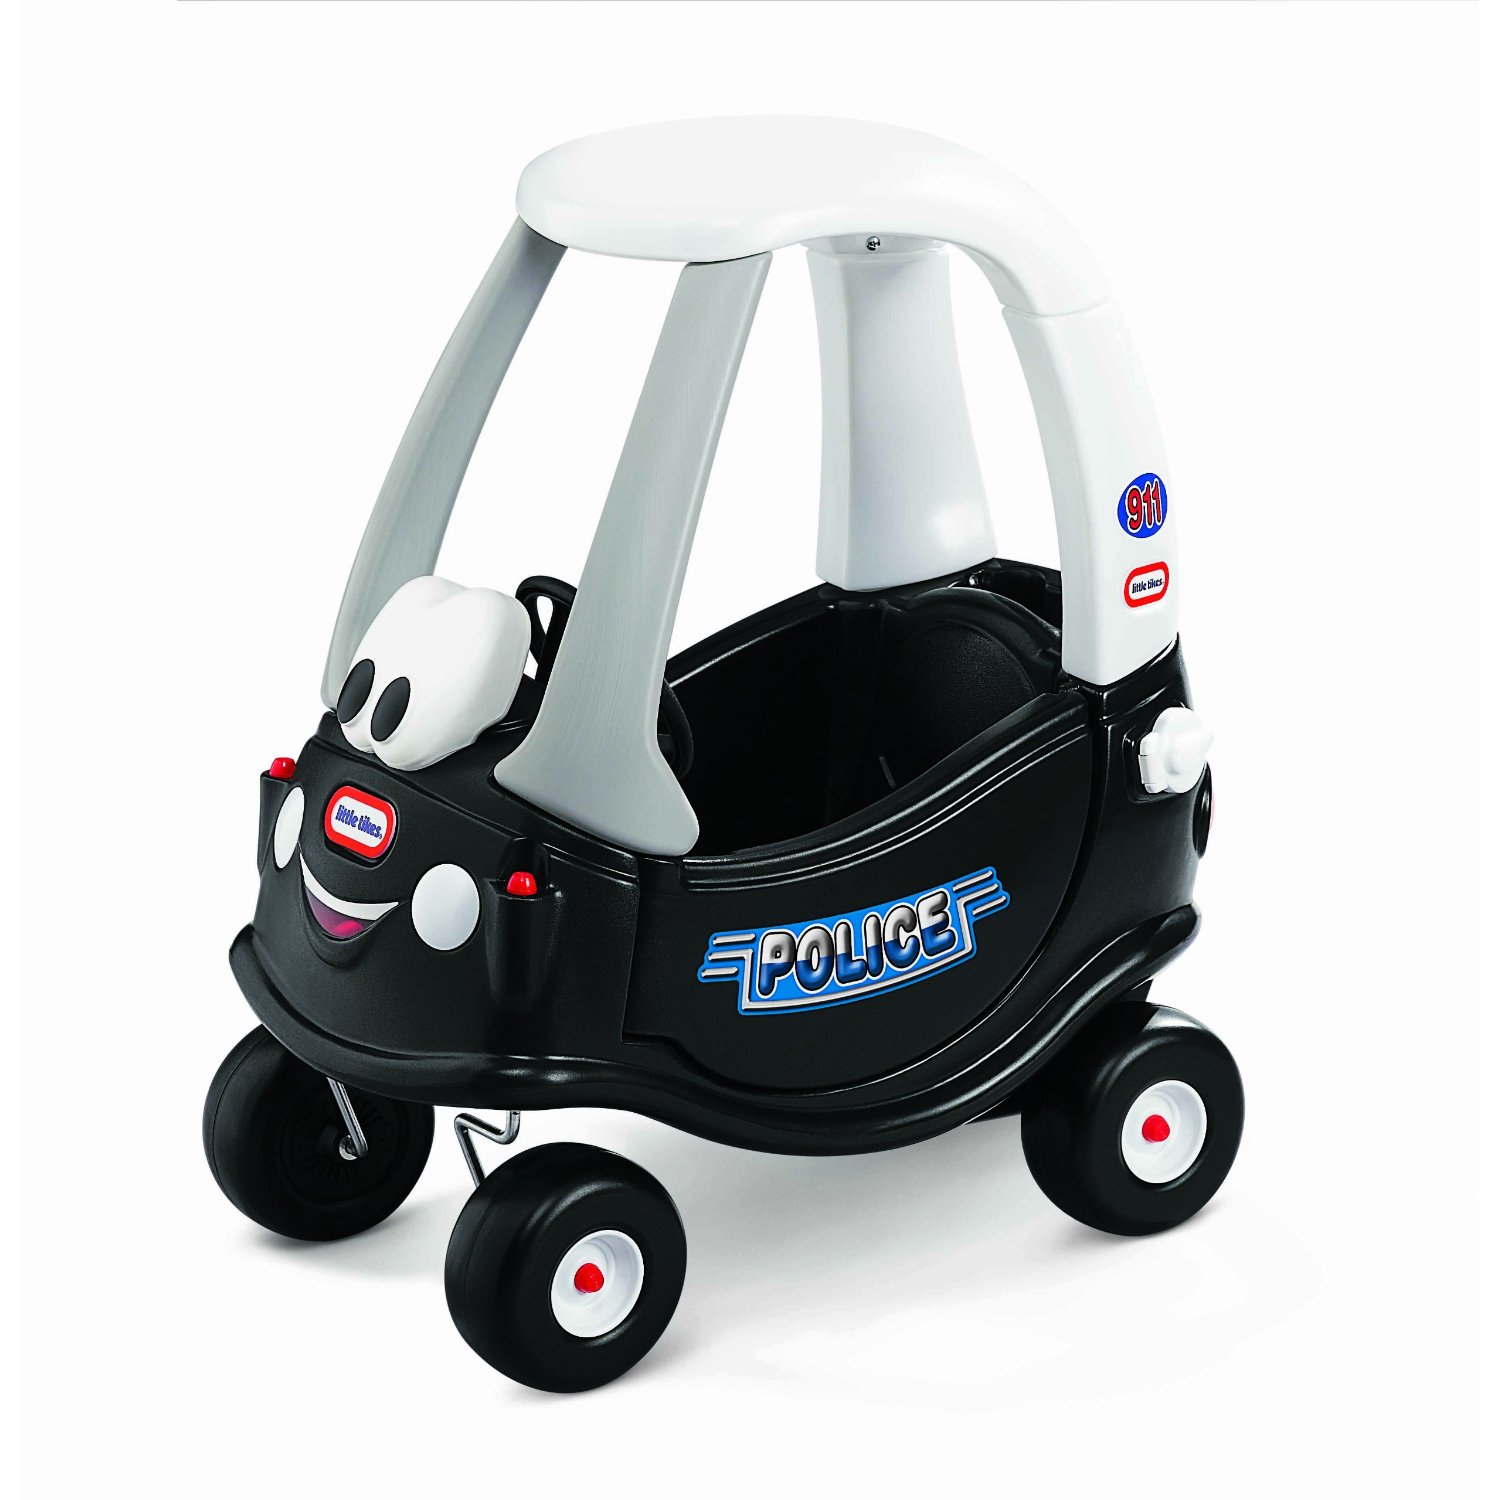
The 999 exhibition was on and fortunately they’d had the foresight to include a children’s play area with Little Tikes push along cars and bikes. M decided against the fire engine but was rather taken with the police car which looked a lot like her own Cozy Coupe:-

Little Tikes Police Car
I saw the exhibition in passing as I pushed M around and around and around in this little car, stopping regularly to crouch down to describe or talk about what we were seeing. M still wanted to get on board the exhibits, but accepted my explanation that we were not allowed to do so in good humour even if it made no sense to her at all.

M also tried out a LittleTikes police bike, but the police car was her decided favourite.

The Transport Museum was also playing host to a craft fair but it didn’t have any handy push along toys so while we did drop in it was something of a whistle stop tour as M whisked us around very quickly. I did spot several people selling crochet bags, a few hand knitted baby clothes and simple sewn dolls. I think there might have been jewellery and even cake, but I didn’t get a close enough look to even consider parting with money.

Sunday was a bright but bitterly cold day, so we decided to try to find something with a little bit of shelter. In the end we opted to combine history with baby animals, the latter being a big draw with M. With this in mind, our destination was Mary Arden’s Farm near Stratford. M was a bit reluctant when we first walked in but when she saw her first free ranging chicken she warmed to the idea, following it to a cow shed.

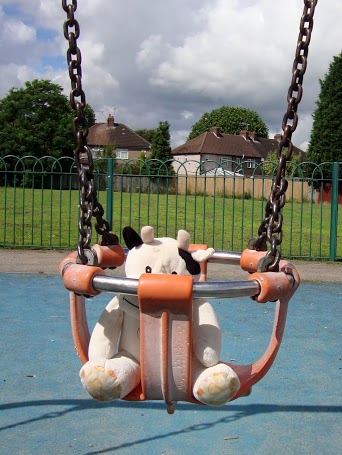
Cow (AKA Ruby)

Now, M has a soft spot for cows and her long standing companion has been Cow (AKA Ruby) who is something of an eccentric bovine, liking swings, climbing, wrapping up against the cold and being pushed around in a pushchair.

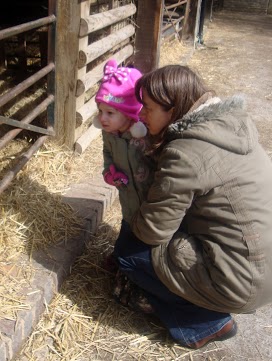
Mummy and M crouch down to get a better look at cows (at Mary Arden's Farm)

This was the first time M had ever seen a real cow and she was fascinated although not quite prepared for how large cows are in real life. We crouched down together and talked to the cows, saying hello to each cow in turn just like in Melrose and Croc.

The cows were friendly, sleepy and a bit bemused. One also looked like she was wondering why her obvious attempts to get her nose scritched were failing (M wasn’t up to touching). We visited the cows several times and M was delighted to witness a calf feeding. She stared at it for a few minutes, a huge smile of understanding creeping across her face as she loudly declared:-

What’s that baby cow doing? He’s having booby!

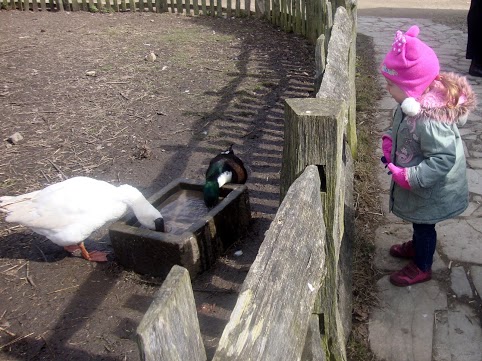
M meets ducks (at Mary Arden's Farm)
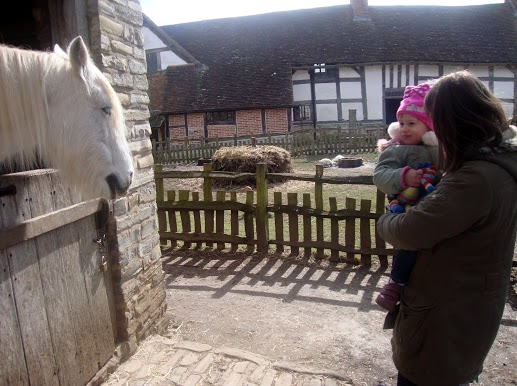
A bit unsure of what to make of the horse
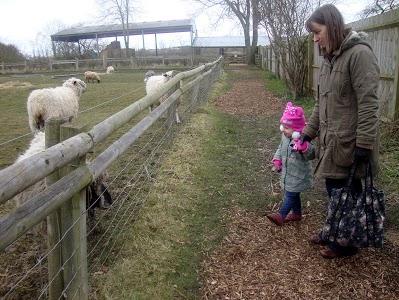
Mummy explains the importance of sheep and wool
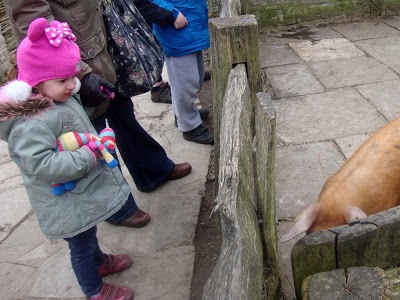
The pigs are curious about Stripy Horse
In addition to the cows, M met ducks, goats, pigs, more chickens, geese (including a feisty trouble maker called Reg) and sheep. All were greeted with a wide grin and much chatter on M’s part. Her companion for the outing was Stripy Horse, who met a real horse who M was a bit uncertain about, possibly because its head was almost as big as she was. Despite her natural cautious inclinations, the horse was the only animal M wanted to touch and she stroked its mane very gently. The horse in turn tried to sniff Stripy Horse which M found funny if a bit disconcerting. The pigs also tried to sniff Stripy Horse, but M had learnt from her experience with the horse and kept Stripy Horse well out of reach.

We went into the main house where there was a cooking demonstration and M noted that the lady was cooking on a fire. She also helpfully pointed out that the lady might need some more sticks.
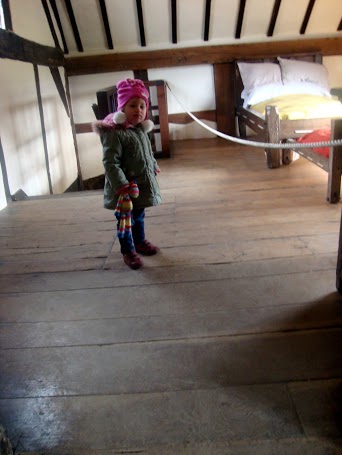
Exploring the main house at Mary Arden's Farm
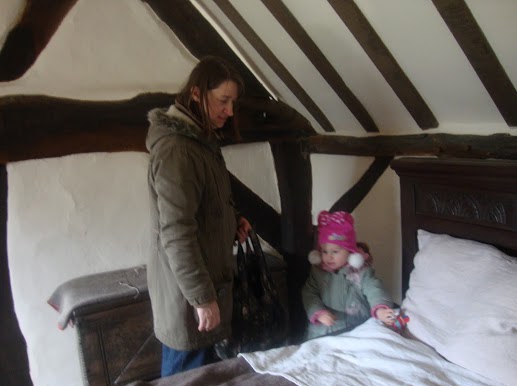
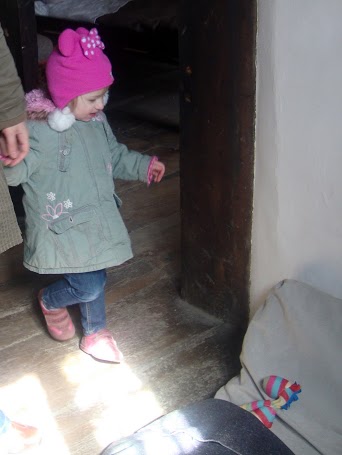
We explored upstairs where the solid timber floors sloped in many different directions and the doorways were very low. There were some beds made up including a pullout cot complete with a rag doll tucked under the covers. Stripy Horse saw the doll and wasn’t to be left out, trying out one of the beds himself and a couple of bed rolls.
Stripy Horse tries out a bed
Stripy Horse tries out a bed roll on the floor
He was a very cheeky Stripy Horse.


There was even an adventure playground, complete with a swing which a very cold M thoroughly appreciated. The slide was a bit steeper than anticipated though and a surprised M was launched through the air at the bottom, landing a few feet away! Fortunately, M took this unexpected flight in good spirits, scrambling to her feet and ran off chortling but did say she’d do something else now.

Easter Bank Holiday Monday I was very tempted by the open day at Toft Alpaca Farm, the yarny in me wanted to touch fibre and there was cake, need I say more?

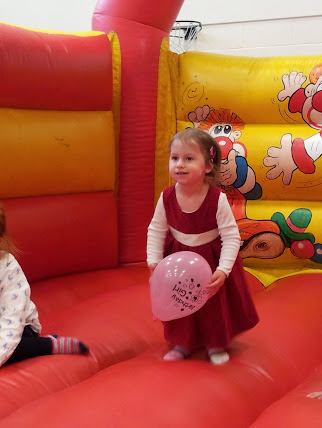
M had a prior engagement and it is still early days for my plan to corrupt her to love all things textile related, so no alpacas for me. Instead I escorted M to a birthday party, where she was introduced to the idea of a bouncy castle.
Photo
Bouncy castle!
Bouncy castles and balloons... A good combination which even topped ice cream!

Monday, 4 March 2013

Meet Puff the Dragon

I’d like to take a moment to introduce you to Puff.
Meet Puff the Dragon
Puff is a dragon and he was made for Dave by his mother, probably before 1983, although Dave cannot be absolutely certain. Puff has stayed with Dave all these years, although he says he was stolen for a brief while after Dave returned from University. As you can see, Puff is a fine specimen of a dragon, but whilst Dave is very fond of him, he has spent a good few years snoozing on top of a wardrobe. His peaceful retirement ended when M spotted him a month ago and asked:-

What’s that?

Puff was duly retrieved, admired, explained, dusted off and promptly adopted by a happy
M.

Once you take a careful look at Puff, you can certainly see why he is so endearing. He’s big to start with. Heavy and very well stuffed. Puff is a toy with presence, gravitas, charisma.

Construction wise, he’s complicated and heavily sculpted, one limb having as many as 13 pieces carefully sewn together. Trim has been carefully applied to give the impression of teeth. His tail still curls around suggesting he once had an adequate counter balance so probably stood on his back legs. The remnants of broken wires can be felt through his once fully posable claws. A reinforced padded tongue lolls out of impressive jaws. His underside is quilted. He still wears his original collar along with name tag. Puff represents many hours of careful sewing, love and attention to detail that my mother-in-law poured into him.

Lack of opportunity and time may have deprived me of my sewing machine, but I can’t help myself when I see something this beautifully, lovingly made. I need to know how Puff was made!

Sadly, my mother-in-law is no longer with us, so I couldn’t quiz her. I asked Dave instead. He told me Puff came from a pattern in a book he had browsed through many times. He said his mother also made a dinosaur called Posh Paws and he admired something called a Heelow Monster (which turns out to be a large American lizard - the gila monster - I live and learn).

Posh Paws I was told, starred in a children’s television show called Swap Shop that Dave loved for its dinosaur content. I didn’t get to watch much television as a kid, so I just nodded. Apparently Posh Paws was this huge purple dinosaur and Dave’s Mum made him one which he promptly loved to death. My mother-in-law, ever ready with her sewing machine made him a second one to replace the first.

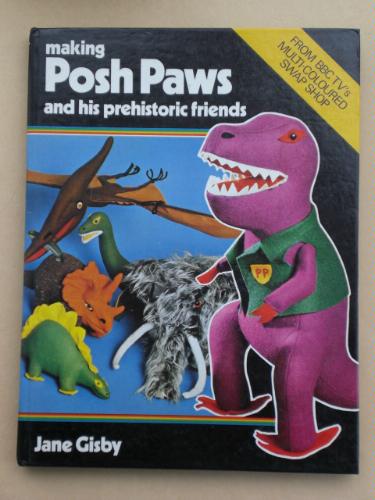
A call to my father-in-law revealed a partial title of the book the pattern these three toys allegedly came from - Posh Paws and Friends - which I quickly resolved to Making Posh Paws and his Prehistoric Friends by Jane Gisby, published in 1978.


Cover photo from Amazon.co.uk
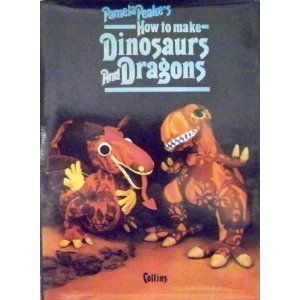
Alas, Dave took one look at the cover and shook his head. Apparently the book he was thinking of had Posh Paws and Puff on the cover beside some little rocks.

At this point, all I had to go on was that Dave would recognise the cover, it had dinosaurs and dragons in it and the book must have been published before 1982. The search engine at AbeBooks came to the rescue revealing How to make Dinosaurs and Dragons by Pamela Peake (1976), which doubling back to Amazon revealed the cover:-

Cover photo from Amazon.co.uk
That’s it!” cried Dave.

But is it?

Dave then said there may have been a third book with the gila monster in it. However, no matter how you look at, that is Puff on the cover so this book would answer the question of how to make a toy similar to him. Not that I want to make a replacement for Puff, he represents Dave’s past and is a link to his mother, who we both agree would be delighted that M thinks so highly of a toy she made all those years ago.

Still my wishlist has several new additions to it; I not only added the two books above but a couple of others from Pamela Peake who certainly seemed to know her soft toys.

For those who might be interested, take a look at:-

Creative Soft Toy Making - Pamela Peake (1974) (I swear that’s Humpty Dumpty off Play School on the cover!)
Making Soft Toys for Children - Pamela Peake (1988)

While undisguisedly vintage, the reviews are good and as the books are instruction manuals I’d hope they’d be as relevant today as when they were published.

Puff sleeping in the living room and accidentally wrapping his jaws around Snake! (3 March 2013)

And now I’ll leave you with another picture of Puff, who no longer sleeps on top of a wardrobe.

Friday, 31 August 2012

Meet Douglas

I may actually be along with a crochet related post fairly soon having managed to finish a project at long last.

In the meantime, please let me introduce Douglas.

Douglas helps M and Baby to do some drawing.

Douglas is a bag puppet which M made herself. I spotted the idea over on An Ordinary Life? a few months back and have been waiting for an opportunity to let M have a go. I sold the idea as doing some sticking which caught M's imagination along with the googly eyes when I dug them out of the craft box.

The aim here was to end up with a recognisable puppet but allow M to take as much creative ownership of the project as possible rather than sitting there and guiding her hands.

I prep'd the bag by applying strips of double sided sticky tape to the top and in approximate locations for the eyes. After that I pre cut lengths of yarn for hair and applied liberal amounts of glue stick to the rest of the bag.

I explained to M that we were making a puppet, showed her the bag, pointed out the sticky tape and then let her loose with googly eyes, yarn strands and various bits we have on hand for sticking. M had fun sorting the eyes for a few minutes and then got stuck in, making Douglas's face with careful consideration. She even made him two hair clips to try to tame his hair.

When M had finished we admired the new puppet and M declared:-

"It's a puppet. It's Douglas. Called Douglas."

And so he was named.

Sunday, 1 April 2012

What to do with a chocolate egg

Easter is nearly upon us and this weekend I remembered that we still had a chocolate egg left over from _last_ year. This left me with a dilemma of whether to force feed M (or indeed Dave) chocolate or to do something more creative with it.

I was thinking of attempting to make biscuits or cookies, but was thwarted by the oven deciding to blow up.

The oven dying in a dramatic fashion was unrelated to my baking aspirations. There was a local power surge, the oven was on, it went bang and that was the end of our supper. It's been a bad month for appliances, with the washing machine springing a leak early in March. Still, at least this time I have insurance!

Back to the left over chocolate.

After a little thought I decided to try my hand at Rice Krispie (TM) cakes. I don't really bake that often and have never actually tried making these but the idea seemed simple enough. I googled a little to see how others had done it and then made my own, aided and abetted by a small child.

Ingredients

  • Approx 125 g of Cadbury's chocolate
  • 1.5tablespoons of golden syrup
  • Approx 25g non salted butter
  • .5 teaspoon vanilla essence
  • Approx 4 mugs of rice pops (supermarket own brand)
  • Some sprinkles to decorate with


I broke up the chocolate egg and placed it in a Pyrex bowl suspended over hot water to melt.

The butter also went in, along with the syrup and a little vanilla essence. I stirred and prodded the chocolate mix until I had a shiny almost smooth mix.

I helped M into her booster seat where she took charge of the rice pops. Not quite seeing the connection with the chocolate sauce, M began tossing the rice pops around with much glee whilst I decanted the chocolate into a mixing bowl.

Intervening in the rice based fun, I showed M that I wanted to add the rice pops to the chocolate, which she happily did. I added some more rice pops to make up for those lost to the floor while M got in there with a wooden spoon.

Things were mixed together. M discovered that rice pops in syrup/chocolate are very sticky and don't fall off a spoon easily. We then went on to find out that they are not that easy to spoon into bun cases. Personally I think it would be easier to spoon the whole lot into a baking tray or shallow dish and cut into pieces later.

Once decanted into bun cases, we decorated with 100's and 1000's type sprinkles. I put some sprinkles in a bowl and let M loose with a spoon. Much fun was had. Some sprinkles went into M. A lot of sprinkles went onto the floor. But between us we did get sprinkles onto the cakes!

M and I add sprinkles to the chocolate crispie cakes


The resulting cakes were very tasty, still slightly soft rather than completely set and easy to eat, rather than the type to break your teeth on.

Very easy to make and child friendly, except for the boring melting of chocolate bit.

Finished cakes


Yummy. I will have to make them again.


Wednesday, 15 February 2012

Dotty Valentines Cards

A few weeks back I decided it was time to introduce M to the heady excitement that is arts and crafts as done at home, as opposed to anything organised by the nursery.  With this in mind, I started stocking up on suitable arts materials, aided and abetted by a 50% off sale at the Early Learning Centre.  I also started looking into potential projects or activities that would be suitable for a small person of M's age (currently nearly twenty months).

In my wanderings through the interwebs, I came across many crafty things and started cataloguing them over on Pinterest for anyone who may wish to take a look.

In particular I came across this suggestion for a Valentine's Card on Sunhats & Wellie Boots (which I highly recommend), using a simple template to stencil a design in relief onto a card.

It caught my eye, I pinned it and then I set about gathering my supplies.

Supplies needed:-
  • Card
  • Some scrap paper
  • ELC Easy Painters
  • One small child
  • An arts apron/bib for small child
  • A mummy or other suitable adult to assist
  • Scissors
  • White tack or similar temporary sticky substance
  • Glue stick
  • Lots of newspaper
I started by covering out kitchen table with a newspaper, something M immediately recognised from our earlier trial run a week or so ago with the easy painters.  Excitement filled the kitchen as she loudly declared "PAINTING! PAINTING!" and tried to climb into her booster seat. I helped her up, strapped her apron (which most definitely is NOT a bib) on and handed her the easy painters along with some sacrificial paper while I carried on preparing stencils and cards.

The ELC easy painters are an interesting idea, they're bottles of premixed and watery paint with a sponge applicator. They need shaking vigourously to mix the paint before working with them, but that's about it. The sponge applicator means the paint pretty much stays inside the bottle until applied to something; if dropped onto the floor with enough force there will be a little splatter but only a few drops which are easy to clean up. The first time I showed these to M she was a little hesitant but quickly got the idea.

Easy Painters in action

On this occasion, M got to work enthusiastically, happily decorating the newspaper covering the table and occasionally aiming at the sacrificial paper.

In the meantime, I cut out two heart templates and stuck them to the front of some folded card using some white tack. Once prepared M and I got to work spotting paint onto the cards.

There was a brief moment when M considered ripping the heart template off the card but she decided painting them was more fun once she saw me having a go as well. At that point M got stuck in, happily painting her card and even working on the inside. I gave her the heart innards which she decorated as well, and even took my card to add her touch to it, thoroughly enjoying herself in the process.


A short while later we had painted valentines cards which I duly rescued as M declared she was finished with the paints and moved onto crayons.

One of the cards just after it had been painted and before drying - you can see the heart template still in place and covered in paint
One of the heart shape cutouts which M very prettily painted - I think this one looks a bit like flowers!


We put the cards aside for a couple of hours to dry and then carefully peeled off the hearts.  I decided to use the painted template and the innards on the inside of the cards which I thought was very effective.


And this one is M's, entirely her own work except for the cutting and sticking bits.

M's card, I love the way she deliberately placed the colours
M chose to add paint to the inside of her card too

Not too bad for our first go at a 'structured' activity, as opposed to just letting M loose with her creative side and a piece of paper. 

M deep in thought choosing which colour to add next
M deliberately placed her dots with a great deal of thought and concentration, she even overlaid the heart innards to get in some additional stencilling.  She also had fun with her fingers, blurring the edges of the dots to give a softer edge. I guess this comes under colour play, colour recognition, fine motor control and sensory play since she also got stuck in with her hands.  Most of all though, it was fun and M was equally pleased with the result as I.


Sunday, 12 February 2012

If you can't beat em

Gosh, it's been a while since I posted here!

Life has been trundling on and while I have had the odd thing to post since May last year, I've lacked the fundamental time aspect to do so. I never knew that being a working mum would leave me with so little time to... well, do anything really. Typing or crafting are real problem areas for me these days as M still loves the laptop and believes that she should have a go at anything I'm doing. With computer time at a real premium I'm also very slow to upload photographs since M always tries to take over and is a dab hand at reconfiguring the laptop.  At nearly twenty months, this is impressive to behold and it can take quite a while to figure out what she did with a few swipes of the touchpad and the click of a couple of buttons!

Ahem. Onwards and upwards though.

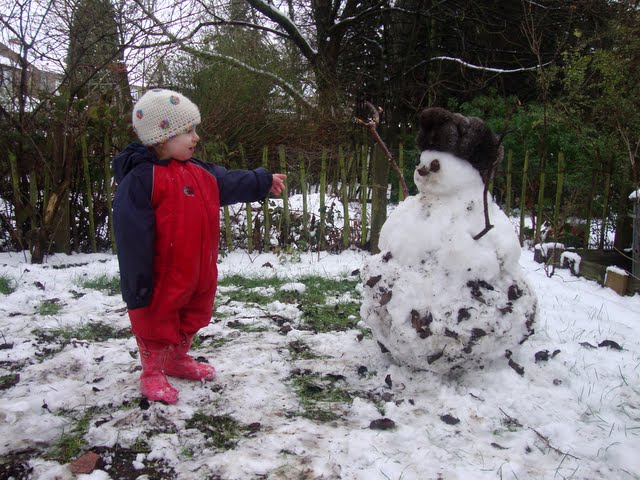
A week late but, last weekend we had snow overnight on Saturday. This meant we headed outside for the obligatory snow sculpture.

Dave showed us how it was done, rolling huge snow balls around the lawn hoovering up all the sticks, rubble and leaves he could find, to construct his snowman who is largely hardcore.  He topped him off with his ushanka.


M says "HAT! SNOWMAN!"

A week later, while most of the snow is gone this snowman is still standing and a testament to Dave's snowman construction skills.

M and I chose a slightly more sophisticated approach, carefully collecting clean snow and packing it together to form our snowman.  She grew more slowly than Dave's and ended up a lot smaller, but both M and I liked her.

Mummy lends a hand building a snowman.

M chose to decorate the snowman with one of her old beanies.

M adds the finishing touches.

She also inserted the arms and added the eyes herself.

A week on and our snowman has taken on the delicate proportions of an Edwardian Lady.

We did of course have snow on the ground throughout December in 2010, but M was only six months old when it melted and so probably doesn't remember it.  She wasn't really mobile back then, so this was her first year of playing out in the snow and I think she enjoyed it.  M had seen snow in books before this and knew what a snowman was.  Indeed her reaction on seeing snow this year was "SNOW! WHITE" and after building the snowmen she was very excited when we came inside to warm up.  She spent a good while running up and down chattering about her "NO MAN".

The snow may have only been around for one day but it certainly impressed one small person.

Tuesday, 31 May 2011

A rainy bank holiday and a new car seat

Yesterday was the late May Bank Holiday which marked the anniversary of the start of my maternity leave last year, but otherwise was a fairly unremarkable day. Constant rain throughout the day meant our plan for a picnic had to be put on hold and as new parents we're still unsure of our options for a day out with a very small child when the weather isn't co-operating.

So I guess I should start with a quick call out to parents with small children, what do you suggest as a day out when it's raining, blowing a gale or being very cold?

Yesterday aside, we have had some excitement over the past few days, although in the first case it's excitement I could do without. I ended up needing to see the out of hours doctor as I had a serious allergic reaction to a cause unknown. An awful lot of antihistomines later and I'm on the mend, but still no wiser as to the cause and therefore unable to do anything to avoid a repeat performance. Needless to say I'm racking my brain as to the cause, but as of yet can't think of anything I did that was obviously different.

Saturday we drove to Milton Keynes to buy M's new carseat, which we really needed before she outgrew her baby seat. Admitedly we probably had a month or two left before she was in desperate need of a replacement, but it's really not something I wanted to leave until the last moment.

After doing the usual rounds in terms of research I decided I wanted to keep M rear-facing as long as possible, or at least until she's about four which presented a problem since Group 1 carseats on the highstreet seemed to all be forward facing.

The internet came to my rescue and so Saturday found us visiting the In Car Safety Centre which is a specialist carseat place which I found via Child Car Seats and Rear Facing. After spending nearly two hours there, over an hour of which involved trying out carseats in my car and persuading a reluctant M to help check fit we finally settled on a seat that fit the car, fit M and had plenty of growing room in it.

This is a surprisingly tear free M in her new carseat after the drive back to Coventry.


I say tear free because M is a bad traveller; whereas most parents tell me their babies/children enjoy being in a car, M never has. I do what I can to make journeys tolerable for her, providing distractions and breaking up long journeys as much as possible, but my little girl just wasn't born to roam.

The surprise hit of the journey home wasn't the new laptray toy we bought her while we were there, but mirror baby (in the mirror I bought so I can keep an eye on M whilst I drive) who she happily pulled faces at the whole time. Fingers crossed the novelty doesn't wear off and not being cramped in her baby seat will make travelling in the car a little easier on M.

Friday, 6 May 2011

A block a month doesn't sound too difficult

A while back, when M was tiny, I tried to indulge in crochet whilst she was asleep in my arms. This worked well until I was forced to return to work and suddenly found that all time was at a premium meaning there was and is very little for myself which effectively stopped all craft related activity.

I'm sure this ongoing hard slog is not good for me but there is no sign of things letting up. In fact with the recent redundancies at work I suspect things are set to get worse.

In an effort to distract myself, I've been trying to make small projects again and came across a block a month CAL on Ravelry. The idea is to make one block a month throughout the year and after twelve months, join all the blocks together to make a blanket. Block patterns are offered in either six or twelve inch squares and I thought I'd have a go at the six inch ones... Mostly because I really don't have the time available to be ambitious and I wanted a project which is achievable.

Decision made, I started the January block in March with lots of enthusiastic help from M.


Now that I'm back at work I find I have so very little time to spend with my baby girl that I prefer to spend as much of the time that I have got in her company as I can. This means for me to indulge in any hobby type activities I need to be able to do them around her. M wants to be involved in everything I do and so I anticipate her joining in, choosing my yarn accordingly and providing a chunky hook for her to wave. M's natural tendency is to mimic and so she 'll study what I'm doing intently before happily prodding the yarn with the hook.


The January block goes by the name of Smoothfox's Flower Button Granny Square, designed by Donna Mason-Svara AKA Smoothfox.


Smoothfox's Flower Button Granny SquareSmoothfox's Flower Button Granny Square

The pattern itself uses American notation and is very clearly written making it easy to follow. I chose to use two colours rather than the three specified in the pattern working in a standard baby DK on a 5.5mm hook.


Smoothfox's Flower Button Granny Square

In one month I managed to make four squares which is quite an accomplishment for me at the moment!

Wednesday, 4 May 2011

Making the most of Easter

Easter has been and gone already, which was (thanks to the upcoming royal wedding), the first of two back to back double bank holiday weekends. With work continuing to be horribly stressful I was determined to do something fun especially since Dave decided to stay at home rather than abandoning us for Maelstrom as is his usual habit.

Fun turned out to be a trip out to Coombe Abbey Country Park on Saturday for which Richard joined us and on Sunday we headed to Ryton Gardens.

Our last trip to Coombe Abbey took place just a couple of weeks before M was born, when walking any distance at all was painful on my poor swollen feet. Then, the park seemed impossibly huge as I tentatively picked my way along the paths... On Saturday however I'm pleased to say Coombe Abbey seemed much more manageable and we saw a lot more of the park.

April has been unreasonably warm and the full blossoms of a cherry tree provided welcome shelter from the sun.


After which we walked through some woodland with very big trees, finding an obstacle course and playground aimed at children much bigger than M. Naturally Dave had to put it to the test as did quite a few other dad's.


We had a picnic lunch and a very excited M was persuaded to have a sleep before we went for a brief wander beside the lake, eventually admitting defeat because the sun was too fierce.

Ryton Gardens lived up to expectations on Sunday and having visited there a few weeks ago it was fascinating to see how the place has changed in such a short time. With no particular agenda or schedule to keep to, we allowed M out of the sling so she could wander around and seeing her cruising around garden benches really brought home to me how fast she's growing. M was again very excited to be out and about; we had to hastily intervene several times to stop her eating sticks or leaves but she loved it.


I also discovered that eating a picnic lunch with an awake baby on my lap meant I was obliged to share.


All in all, both days out were good, relaxing and fun. Just what the doctor ordered and I mostly avoided thinking about work. With a double bank holiday I reverted to just being M's mummy for a couple of days, which was great.

Friday, 8 April 2011

Alas spare time, I knew you not, but...

The last time I posted here, I was lamenting on how little time I had to update. That was before I returned to work and discovered that if I thought I had little opportunity for, well, anything before... Once numbered again amongst the gainfully employed, I'd have absolutely no time at all!

And that dear reader is why this blog has remained silent so long. There have been moments when I had something to write. I may even have been near a computer, but I haven't had the time to do much more than work, deal with some very unpleasant work related fallout and look after baby. In those rare moments I have managed to turn my thoughts to something creative, trying to write about it or photograph it, let alone actually get the photographs onto a computer have become incredibly challenging.

So, please bear with me for this post which I started back in early February!

Christmas and early January flew by, lost somewhere in the preparation for returning to work. Christmas itself was good, with the present aspect of things dragged out well into the New Year as we only opened a few of M's gifts each day so that she had time to appreciate each new toy. By the end of the Christmas season, M had become an expert present unwrapper and learnt a new skill, that of ripping things. This new skill transferred well to many things, but most successfully onto paper and food.

Wrapping paper was also a great hit and in M's eyes, as much fun as the gift it concealed. She liked hiding under it, crinkling it, waving it, ripping it and of course nomming it.


With Christmas out of the way, preparation for my return to work stepped up and I spent a couple of hours at the nursery every day, settling M in, which pretty much took up all of my remaining maternity leave.

I did make a couple of hats as Christmas presents, but just didn't get a chance to photograph them before passing them to their new owners.

Having successfully crocheted three hats and discovering in the process how easy they were, I decided it was time to make a new hat for M. After all, the ones I'd bought were only sized to six months, so I knew that she'd need another one - what more in the way of an excuse did I need?

I eventually found some yarn to my liking. Wendy Mode DK is a 50% Merino Wool, which is deliciously soft, had no scratchiness at all and was machine washable. The high wool content should mean it is nice and warm, while DK is a good weight for a baby's hat. White seems a nice traditional colour for a hat, but I decided I wanted to jazz the final result up with a little surface decoration, so I dug out a brightly coloured, very loud acrylic which normally shouts from across the other side of the room.

I swatched for a bit and decided to work a little tighter than I normally would with a DK weight yarn, opting for a 3.5mm hook which gave me a guage of 17 stitches x 11 rows = 10cm square worked in trebles - note I'm using British notation here!

Once I'd decided the guage I wanted to work at, it was just a case of doing the maths and aiming for a hat that would be a little too big since I wanted it to last this winter and if possible take us into the next.

After sneakily measuring M's head whilst I distracted her with a sock, I worked out that I needed to aim for approximately 70 stitches at the brim, giving a circumference of approx 40cm (16 inches). Armed with this knowledge, I decided to start with a circle of 10 stitches and increase up every row until there were 70. I put row of eyelets at the brim before adding a round of doubles in my chosen contrast yarn.

Finally, I made up ten spots or jewels, each made up of twelve trebles joined in a circle. In each case, I used the loop method to start and left the tails long, using them to secure the jewels to the hat, arranging them in a random fashion. And this is the result.

SpottedJewel_Jan2011_1

M very kindly helped throughout the project, testing the yarn for potential felting hazzards and confirming that it was very tasty as well as squidgy soft. She has also decided that she wants her own crochet hook and wants to play with string just like Mummy. Having taken a keen interest in progress on her hat, M was more than happy to model the final result and here she is, the proud owner of a new hat.

Spotted_Jewel_Jan2011_5

The contrast yarn works well and in very small amounts, this exceptionally loud yarn is considerably subdued working to complement the creamy white of the main colour. The hat is slightly too big, but not so huge that M can't get any wear out of it this winter and as far as I can tell, there is no scratchiness to irritate very delicate skin. The hat used very little yarn, taking about 3/4 of a ball of the Mode, which according to Ravelry is approx 100m or so. I used a tiny amount of the contrast colour, scraps really, meaning I still have a few balls of this stuff to get through, so it may be featured here several times in years to come.

SpottedJewel_Jan2011_3

Spotted_Jewel_Jan2011_6

I like it and so does M :-)