Sunday, 28 July 2013

If at first

A long, long time ago in the distant past when M was not yet in our lives I picked up a very pretty book called Vintage Crochet by Susan Cropper. This really is pretty book full of pretty things all beautifully photographed and would grace any well placed coffee table. As with many craft books I own, I admired this book but had so many other projects on the go that it sat waiting patiently on the shelf for quite some time.

When I finally did start a project from this book, it was an ill fated attempt to make a toy rabbit named Syd. This was way back when I had plenty of crochet experience but little practice reading patterns coming as I do from the background of just 'wrap the yarn, stick it through a hole, wrap it again and pull it through' school of crochet as (very effectively) taught by my nan. So it was that Syd was one of my early attempts to follow a pattern.

It all went horribly wrong. I couldn't make the pattern work. The instructions just seemed bizarre and no matter how I tried my rabbit looked wrong. Syd was the first project I cast into the frog pond and vowed never to go near the pattern (or book) again.

Time passed.

M came along and in the fullness of time I started looking for a cute toy to make for my wonderful little girl. I remembered Syd and time dimmed my memories of the frustration of trying to follow that particular pattern. Syd the Rabbit was a lovely toy with a sort of timeless quality about it and so I decided to give the rabbit another go.

Of course now things were a little different. I had followed other patterns and no longer felt the need to slavishly follow instructions which made no sense. The other big plus was other people had made the rabbit and I had the benefit of their notes via Ravelry. I read what other crocheters had to say and found I was not the only one to find this particular pattern difficult to follow, which really is a shame because Syd is not a complicated toy.

I read the pattern again and came to two conclusions:-

The designer has her own way of writing out her pattern which I personally can't follow.

This toy was never intended to be played with by a real toddler who is very hands on, in a pull or poke it to see what happens next kind of way.

I decided the only sensible thing to do was to use the pattern as a guide and the inspiration, but to do my own thing.

Six months later, the last two months of which the rabbit sat waiting for me to sew its face on, I can finally reveal my version of Syd, or Hop the Rabbit as M named her a few moments after the last stitch was placed.
Hop The Rabbit
I didn't really keep track but was winging it the whole way. Worked in cheap acrylic on a 4mm hook, Hop is significantly bigger than Syd, achieved by adding in a few rows between decreases to give a longer body. I had to scale up the head, arms, legs and ears to match. The feet I completely changed because I didn't want to use triple triples because they would leave big holes my toddler could poke her fingers though. I decided against a pompom tail for similar reasons as M likes to pull things apart so I could see a pompom being very short lived.
Hop's bunny tail
For the face I tacked in the rough position of the features then just did a tight satin stitch over the top in buttonhole (or top-stitch) thread. On reflection, were I to do it again (or for another toy) I'd use a contrasting yarn instead of thread as I think the effect would be neater as well as quicker to sew in place.

M was delighted that the rabbit finally had a face, hovering close as I worked on the embroidery and even helping to pull a few stitches through. She decided this is a girl rabbit and named her Hop. Hop was immediately put through her paces and prepared for her first scooter ride.
Hop puts on her helmet
Here she is riding on her 'scooter'.
Hop on her 'scooter'
Now the project is complete I'm happy with the resulting toy. I do think the pattern is poorly written and if making this toy you need the errata (found here - including full pattern) before attempting to make Syd. Or just use the pictures in the book as your guide and have fun doing your own thing.

Tuesday, 23 July 2013

It never gets old

Mary Arden's Farm near Stratford is proving to be one of our favourite haunts this year. On Saturday we headed back for our fifth visit since Easter, drawn by the Crafty Beast event. Not that we really took part in any of the organised entertainment as M just wanted to explore (as always).

What I particularly like about the site is how something new seems to capture M's attention every time we visit. This time was no exception. While M wasn't interested in the arena (other than liking the bunting and wanting to try out the obstacle course intended for ducks) she did enjoy playing hook a duck while we chatted to the people from Transition Stratford. The ducks were there to illustrate a report about some plastic ducks that were part of cargo lost overboard in the Pacific and were then tracked around the world as they were carried by ocean tides. Apparently at least one duck made it as far as The Arctic!

M naturally said hello to the cows, one of whom was very appreciative of a bit of fuss from Dave attempting to engage in a spot of mutual grooming and thoroughly sliming him in the process. Naturally M found this very funny. We were also very taken with the ferrets which M had never seen before.

We rediscovered the two wells outside Mary Arden's House and M was particularly happy to see one of them still had a pail attached. M has been fascinated by the concept of wells and what they were used for since our last visit. There were two wells at Astley Castle which equally captured her interest and seeing the wells was something she'd been looking forward to. We looked at the pail, talked about the winch and its use, looked at the water and sang Jack and Jill before M pointed out the pail was big and would be heavy which was probably why Jack fell down, so perhaps he should ask a horse to help him. I just love the way M's mind works and is making links all the time.

Next Dave distracted M with a trip around the garden and feeding the goats while I talked to the Stratford Spinners and Weavers (more about this later).

We ate our picnic lunch in the playground and for the first time ever M didn't immediately head for the swings but was more interested in the small obstacle course. After lunch Dave and M watched some goat races but the goats got confused and ran back the other way, causing M to declare them not very good at racing.

Goat racing done, we went for a wander to check out the wild flower meadow but didn't get that far due to distractions. M discovered that thistles are prickly and apples grow on trees. We inspected some impressive cracks in the very dry ground and then we found a willow tunnel complex or bower which M loved. The tunnels were sized to allow easy passage for a small person but were a bit tight with low ceilings for those of more adult proportions. M found this very exciting and ran though the tunnels repeatedly, shrieking with glee and giggling the whole while.

M running amock in the bower
M finds a gap to peer through
We eventually trapped the small person and carried her back to the car. Home we went and after a short nap we carried on with this...
Cardboard braiding disk with braid
This is a small braiding 'disk' made from cardboard which I was given by the Spinners and Weavers. It was one of many that they had prepared to demonstrate weaving or braiding cords. It is a fantastic idea as the cardboard grips the threads holding them firmly in place as you braid. This is based on a Japanese method of making braids called kumihimo but The Tudors would have been able to make similar braids using finger loop braiding.

The pattern is easy enough to follow. Make an eight sided disk, roughly octagon shaped and poke a hole in it using a pencil then cut a slot in each of the sides.
  1. Take seven pieces of yarn or thread of your choice and cut them so they are of approximate equal length. 
  2. Knot them together at one end then poke the knot through the hole in your disk.
  3. Arrange the threads through seven of the eight slots and tighten then up to tension the braid.
  4. Hold the disk with the empty slot nearest to you then count three threads to the right.
  5. Pick up the third thread and move it to the empty slot, tightening it as you do so to maintain tension.
  6. Rotate the disk to the left until the newly empty slot is in front of you.
  7. Repeat from 5
And that's it. Keep going and you will make a braid.

This has become a joint project with M. We count off the threads together and name the colour, then M picks up the chosen thread and moves it to its new slot. M has decided she likes the burgundy thread the best. This project is great for practising counting, talking about colours, patterns and working on those all important fine motor skills as well as lots of fun. We're both very impressed with the resulting braid which is working up quite quickly.

Friday, 19 July 2013

And we have bread

The recent unexpected spell of overly warm weather (AKA summer) has meant that I have actually managed to get bread dough to prove in a timely fashion.

Tuesday, 16 July 2013

Teeny, tiny

I am on the hunt for teeny, tiny crochet projects that I can do in the few moments I have my hands free and I'm not busy doing something else. Since becoming a parent, these moments have been rare and I find I need something I can pick up then put down again at a moments notice with little impact on the project in hand. It must be something that doesn't care about consistent tension and will tolerate extensive ripping back because I got distracted at the wrong moment. To minimise frustration, any pattern must be foolproof and not assume I can count or remember what I was doing the last time I picked the piece up. Avoiding the tiniest hooks is also a must as is over reliance on stitch markers. Meanwhile the yarn must be hardy stuff which is easy to untangle and reuse. Minimal sewing or making up and no pins beyond those needed for blocking are also essential. If it can get away without being blocked, even better.

Any (sensible) suggestions happily accepted!

In the meantime, I had a go at making a teeny, tiny bracelet.

Millefiore flowers
Here we have four 'Millefiore' from 201 Crochet Motifs, Blocks, Projects and Ideas by Melody Griffiths, worked in stash crochet cotton thread about No. 10 weight. I'm afraid the ball bands are long gone, so I can't tell you the brand. I used a 3mm hook and they came out fine, but I would have used a 2.5mm hook had I been able to find one!

I joined each of the flowers as I made them up, then added a Base-ch/dc band approx 15cm long to each side, which I think should be long enough to tie them to a child's wrist.

Bracelet after light blocking... Photographed in the sun, just look at the white!
A teeny, tiny project that was done just for fun.

Sunday, 14 July 2013

A Sunday trip to the park

It has been another scorcher of a day here in Coventry so we decided to make the most of it and headed to a local park. Sadly we don't have any nice parks within easy walking distance, the few we have tried are small, prone to dog poo, vandalism (sometimes involving dog poo), have poor play equipment or attract the wrong kind of visitor. This means that to find what we consider a nice park we have to get in the car so when I say local, I mean in or near Coventry.


Thursday, 11 July 2013

This Old Man

Very proud mummy moment. Today M made her first mostly solo craft project, This Old Man.

This Old Man, made by M (July 2013).
M has been practising with scissors for a couple of months now, but mostly cuts for the sake of cutting rather than making something. Such is her drive to cut things that scissors have become a bit of a hazard to any other craft or art project. Today's cutting and sticking session started out with the usual stickers, sequins and random cutting. We took a short break to pick up all the sequins which M had liberally scattered on the floor then M got her second wind and This Old Man was created.

M explained that This Old Man is a hairy man with hairy boobies and hairy legs. He has two eyes, one on each side of the paper and rainbow hair. This Old Man also has a loop of tape on the back because he is a 'man mask'. M did all the cutting, shaping and sticking for this project. The inspiration is also hers and we repeatedly sang This Old Man as she worked.

After a brief interlude, This Old Man had a makeover as he prepared to do ballet and go to the moon. M has deliberately added some notches for his helmet, ruffles and moved one hairy booby (to his knee) to make room for some stars.

This Old Man dressed for ballet and a trip to the moon.
I am very impressed. We do a fair bit of crafts, some directed by me with M's own unique spin included and some where M has a free hand to do whatever she wants. Today, my only input was to supply the materials requested, to advise on glue application and to break off a bit of tape when asked to do so.

M reports that This Old Man is not very good at ballet and needs lots of practice. He enjoyed his trip to the moon and naturally took a (soft toy) dog with him, but his landing was a bit rough caused his hair to fall off!

Monday, 1 July 2013

Fathers Day came a little late

Father's Day coincided with M's birthday this year and sadly for Dave, M's birthday celebrations took precedent. Not that we forgot him and M did work hard to make suitable gifts for her Daddy, but we held them back for a week as M was rather focused on her own special day, after all it's not every day you turn three!

A little cannibalism

We had this year's first sighting of ladybird larvae yesterday morning as we were preparing to head out to Astley Castle with a picnic. The forsythia next to our front door was quite literally crawling with them in varying sizes and stages of development.

M was very excited, declaring them caterpillars... Which had us explaining they were indeed similar but were baby ladybirds not baby butterflies. M wasn't to be deterred though and insisted they were caterpillars. M likes caterpillars.

She was particularly excited to see this pair...

One ladybird larva eating another one that had started to pupate
You are looking at a photo of one very large larva, actively engaged in eating one of its fellows that had started to pupate and was therefore defenceless.

Lovely. We're very tempted to move a few of them round the back where they might find more aphids to chomp on!

Thursday, 27 June 2013

A mercy mission

Next door's cat has taken to stalking birds. Dave intervened to get him to drop a young thrush on Saturday. Once the cat had been forced to retreat, we stepped in to see what we could do for the poor bird, but alas it was very young, in severe shock and sadly, it died.

Imagine our surprise on Sunday when our neighbours knocked on the door to report their cat had done it again. There was a bird in their kitchen and they expected Dave to do something about it!

Dave (bless him), tried to pass the responsibility back to them by handing them a shoe box.

A few minutes later, they knocked again and gave the shoe box back, complete with a bird inside.

I'm not sure when it became our responsibility to take care of baby birds brought in by their cat, but when faced with someone thrusting a hurt bird at you, it is hard to know how to react. So it was, we acquired our second bird in less than 24 hours courtesy of the neighbour's cat.

This one looked ruffled, missing a few feathers and appeared to be a bit stunned, but was older so we hoped it might be OK. We made a tentative identification as a chiffchaff and then put it in a covered cat carrier with some drinking water and waited to see if it would perk up.

A couple of hours later, it looked considerably brighter, was responding to our presence and trying to perch. Heartened that it might survive, we checked again, posted a pic on a Facebook wildlife page and discovered this was a blackcap.

Young blackcap, found in our neighbour's kitchen

We added some twigs and blueberries, then had the dilemma of what to do with it. Wild birds are just that, wild... And we had no desire to keep one captive, not to mention that having two cats of our own, our house would undoubtedly be a stressful environment for our unexpected guest.

We've taken wild animals to the PDSA and RSPCA before, but not been happy as we're fairly sure they've been euthanased, so we decided to look for a local wildlife sanctuary. Our first thought was to call Brandon Marsh to ask for advice, but it being Sunday, no one answered the phone, hence we took to the internet and found the Nuneaton and Warwickshire Wildlife Sanctuary.

We sent them an email, then Dave tried the phone and was surprised when someone answered. Even better, yes they were happy to take the suspected Blackcap. Cue a Sunday evening dash to Nuneaton, with M in tow because she insisted she wanted to come too.

We got lost. Horribly lost in that I knew exactly where we were and where we wanted to go, but had no idea how to get there as we were trapped inside Nuneaton's one way system! M was being very patient and singing to the bird (after I explained that I wouldn't put a CD on in case it frightened the bird), her song of choice being Soldier, Soldier. M kept asking if we'd reached Nuneaton yet so I said we were there, but I was a bit lost and I was trying to get us to the wildlife sanctuary. M offered the eminently sensible suggestion that we should go home.

In the end, by pure cunning and stubborn determination I ended up on the correct bit of one way street heading towards the wildlife sanctuary which is based in an unassuming bungalow. Once there, we got the bird out of the car, still in its improvised cage and headed inside (with me hoping they hadn't had a call out in the time it had taken us to get there).

Fortunately, someone came when I rang the bell and in we went to immediately encounter a young deer blocking our path. It was quite literally standing there, being nosy and forcing us to walk around it so it could get a good look at us. M was shorter than the fawn so asked (not unreasonably) if it was a horse. We were shown into a shed where a young fox sat watching in a puppy cage where it apparently sleeps. The shed floor was very springy, so bouncing expert that she is, M started vigorously jumping up and down.

I scooped the excited small person up before she frightened the fox and showed her 'our' bird which was briefly examined before being whisked away to the reptile shed where it is nice and warm. Apparently they had several fledglings there so it would have company while it recovered. M was very concerned that the bird had been taken, but was finally reassured that it was in the best place and that this was an animal hospital. I carefully explained that normally, if we found a baby bird we'd take it back to its mummy and daddy, but since the cat didn't tell us where he found the bird we couldn't do this. That was why we'd brought the bird to a animal hospital and they'd look after it now.

Satisfied M nodded and said she'd like to play. There was a bit of consternation when M asked where the swings were but I pointed out the garden was full of sheds so had no room for a swing, plus it was very late, Daddy would wonder where we were and we had to go home. Which is exactly what we did...

Mission accomplished and I now know where the Nuneaton wildlife sanctuary is although I can't guarantee I wouldn't have similar problems navigating my way there again. Personally though, next time the neighbour's cat brings in a live bird, I intend to hand over their contact details along with a shoebox!


Friday, 14 June 2013

What shall we sing?

We made a song or story board.

For those who do not know what a song board is, it is a felt board to which you attach pictures to help lead you in a song or story session. It can be a useful tool with small children for focusing attention or choosing which songs to sing, particularly if you have several children to engage with.

In our house of course, we only have one small person, but M does love singing and always has. We sing a lot in our house as will as when out and about -- yes, I am the mother who will walk down the street hand in hand with my daughter belting out some nursery rhyme or other. M loves making up songs about her favourite books/toys/what she is up to (or getting us to), which can make keeping up with her musical needs challenging, but we do our best. Not too surprisingly, M also enjoys the singing aspect of Rhyme Time at the library or various parent/toddler groups we've tried and so we thought we'd bring that into our home.

The first thing I needed was a board.

We used an off cut piece of mounting card,which is usually used for framing photographs. It was fairly heavy weight cardboard so unlikely to bend accidentally, but being approx A3 sized wasn't too big for M (who is nearly three) to carry.

I covered the board in felt, blue on one side and green on the other.

Having never worked with crafting felt before, I'd assumed it was pretty much all the same. I was wrong. Felt can vary a lot in thickness and 'hand' or how it feels when you touch it.

The first lot of felt I bought on the internet was quite frankly rubbish. It was stiff, not very fluffy and thin. It was described as being suitable for craft and board covering, which to me meant it should be ideal for what I had in mind, but apparently not. I ended up using it as a base layer and then covering it with more expensive felt I'd bought from our local market. The advantage of the market was I could feel the felt, assess it for fluff and thickness and check it wasn't going to crease like paper if M picked it up or tear on its first contact with velcro!

This was very much a joint project with M, so we used PVA to glue the felt to the board, I trimmed it and then we added a second layer of felt to the first. We used pegs to hold the felt in place whilst it dried, then once it was done I trimmed it again and we stuck down the edges with heavy duty double sided sticky tape.

M applies PVA for a second layer of felt.

All pegged down and left to dry...

To finish, I added some fabric tape to cover up the rough edges.

It is not as neat as it could be, but I was making it up as I went along and acting in a fast, decisive fashion is essential when you're being assisted by a nearly three year old who might otherwise take matters into her own hands!

Once the board was complete M and I compiled a list of songs we'd like to sing. Once we had a few, I drew pictures which might represent those songs with the exception of a suitable guardsman for 'The Grand Old Duke of York' or 'Soldier, Soldier' where I faced a mental blank so Dave stepped in.

I cut the pictures out and stuck them onto cardboard. In our case, I reused empty cereal boxes and for my first batch used PVA to glue them down.

PVA turned out to be a mistake, water based glue and non-permanent marker just don't mix well with the ink on the paper running quite badly, hence for my second batch I used good old glue stick. Ideally, I think I'd laminate the pictures to make them wipe clean and durable, but I do not have a laminator and to be honest, when the pictures wear out we'll just make some more which will be fun.

Pictures glued to cardboard - PVA is a bad choice!

I re-inked the pictures then cut them out before passing them to M who coloured them in. Once she was done, M stuck the hook part of velcro dots to the back of each picture and stuck it on the board.


Finished song board, complete with first batch of pictures to choose from.
At last - a song board or as M says, a choosing board.

What shall we sing when we sing together?
Would you like to choose?

For the uninitiated, the idea is to take turns in choosing a song. Everyone sings the choosing song and then one person (or toy in our case) chooses a picture from the board. The board is turned over and the picture is stuck on the back. The person who chose then tells everyone what song they'd like to sing as represented by the picture. There are no hard and fast rules tying picture to song, providing the chooser knows the song and can loosely associate it with the picture, all is good.


Sunday, 2 June 2013

A tiny bit of crochet

There is actual crochet happening here. Or rather it did, briefly...

Motif for Betty shrug

This is the first motif for Betty (Ravelry Link) from Vintage Crochet, which I bought a few years back when I was easily won over by the pretty pictures and it sure is a pretty book.

The secret to making this motif was to go to a park with a picnic, then to hand over toddler chasing duty to Dave for half an hour whilst I grappled with the pattern.

As it happened, once I got the thing made I decided I didn't like it.

If you look at the joins between rounds in the bottom left corner, you may be able to see they are a bit 'clumsy' and look crowded. Blocking may sort this out, but if I manage to finish this garment it and if I intend to wear it, I'll not be blocking every time I wash it!

So... I reworked the troublesome join on the 4th round, replacing the 2ch tr into the first dc with a single ch and a dtr.

Corrected join on round 4

Much better!

OK, it may not look that much different, but I  can see the difference and if I'd left it, it would have annoyed me every time I looked at the piece.


Thursday, 4 April 2013

Easter outings in the cold

We’ve had an enjoyable and somewhat packed Easter this year, as we endeavoured to do something despite the freezing weather... For us, as always the challenge was to find suitable days out which held something for us adults and M alike, preferably not too exposed to the elements given that the temperatures have struggled to get more than a degree or two above freezing!

Being Coventry based, we headed to the Transport Museum on Saturday bundled up against persistent snow flurries that swirled around us as we walked along. M isn’t a huge fan of Coventry’s Transport Museum, since the exhibits tend to be for looking at only with no touching. M is more of a hands on kind of a girl, so finds it inexplicable that you should have all these interesting vehicles behind rope barriers and she (nor us) are allowed to climb aboard, sit in them or fiddle with them to our collective hearts content.

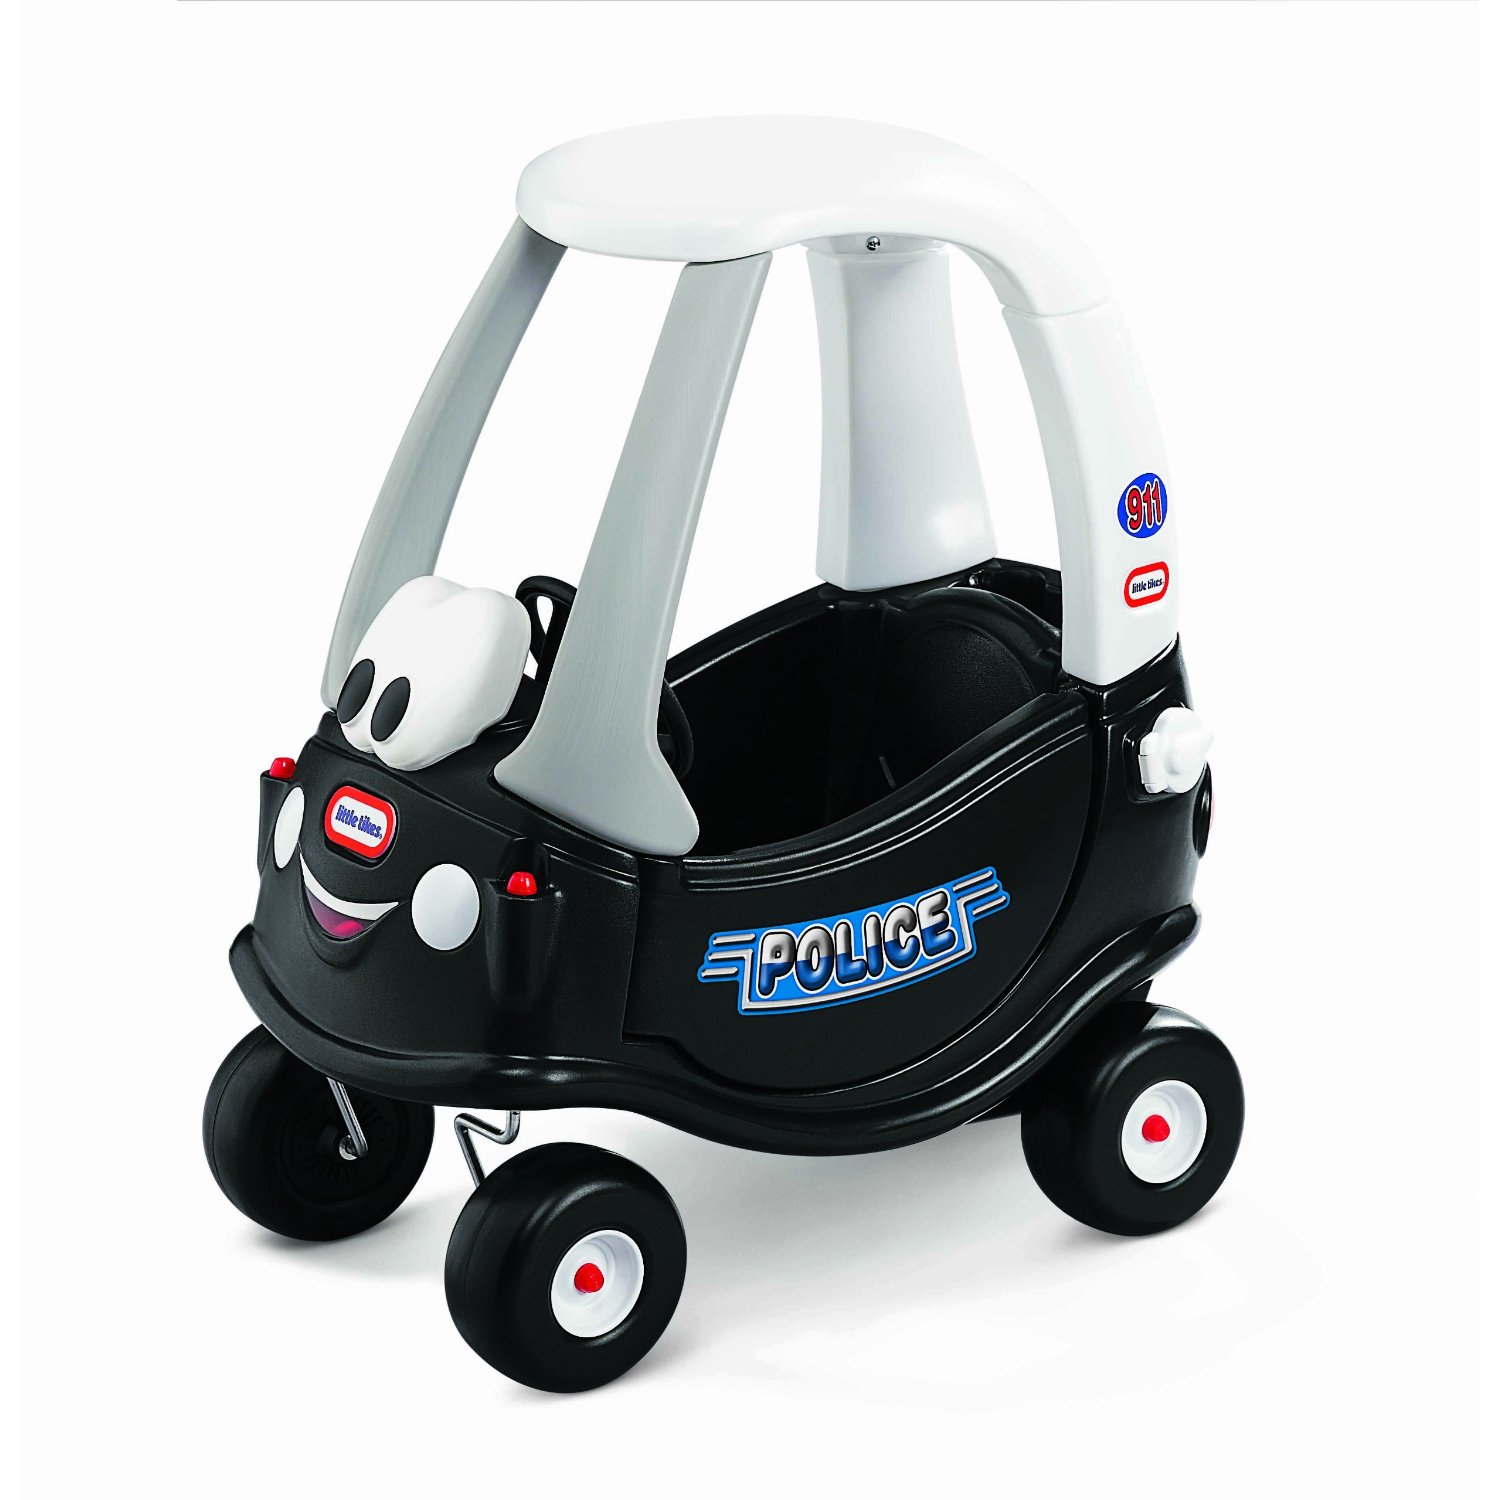
The 999 exhibition was on and fortunately they’d had the foresight to include a children’s play area with Little Tikes push along cars and bikes. M decided against the fire engine but was rather taken with the police car which looked a lot like her own Cozy Coupe:-

Little Tikes Police Car
I saw the exhibition in passing as I pushed M around and around and around in this little car, stopping regularly to crouch down to describe or talk about what we were seeing. M still wanted to get on board the exhibits, but accepted my explanation that we were not allowed to do so in good humour even if it made no sense to her at all.

M also tried out a LittleTikes police bike, but the police car was her decided favourite.

The Transport Museum was also playing host to a craft fair but it didn’t have any handy push along toys so while we did drop in it was something of a whistle stop tour as M whisked us around very quickly. I did spot several people selling crochet bags, a few hand knitted baby clothes and simple sewn dolls. I think there might have been jewellery and even cake, but I didn’t get a close enough look to even consider parting with money.

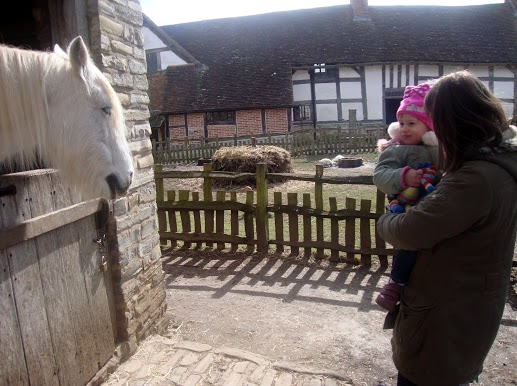
Sunday was a bright but bitterly cold day, so we decided to try to find something with a little bit of shelter. In the end we opted to combine history with baby animals, the latter being a big draw with M. With this in mind, our destination was Mary Arden’s Farm near Stratford. M was a bit reluctant when we first walked in but when she saw her first free ranging chicken she warmed to the idea, following it to a cow shed.

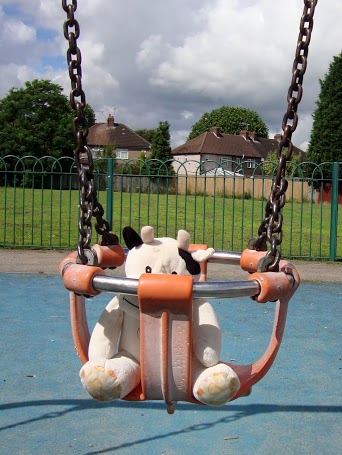
Cow (AKA Ruby)

Now, M has a soft spot for cows and her long standing companion has been Cow (AKA Ruby) who is something of an eccentric bovine, liking swings, climbing, wrapping up against the cold and being pushed around in a pushchair.

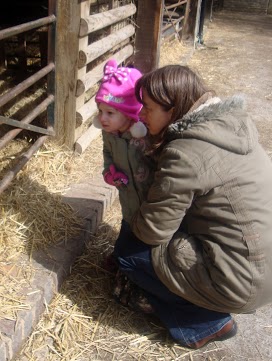
Mummy and M crouch down to get a better look at cows (at Mary Arden's Farm)

This was the first time M had ever seen a real cow and she was fascinated although not quite prepared for how large cows are in real life. We crouched down together and talked to the cows, saying hello to each cow in turn just like in Melrose and Croc.

The cows were friendly, sleepy and a bit bemused. One also looked like she was wondering why her obvious attempts to get her nose scritched were failing (M wasn’t up to touching). We visited the cows several times and M was delighted to witness a calf feeding. She stared at it for a few minutes, a huge smile of understanding creeping across her face as she loudly declared:-

What’s that baby cow doing? He’s having booby!

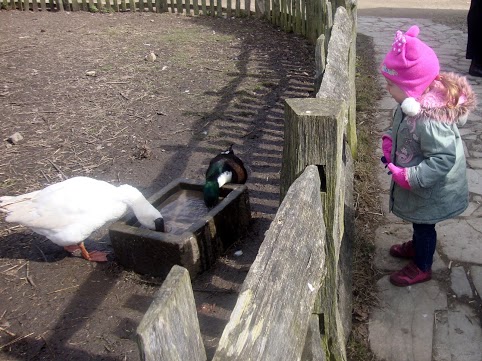
M meets ducks (at Mary Arden's Farm)
A bit unsure of what to make of the horse
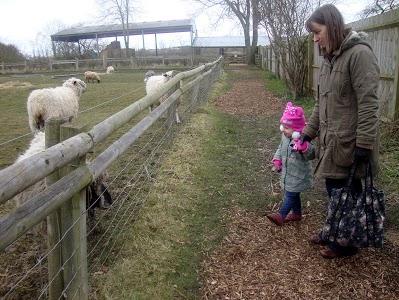
Mummy explains the importance of sheep and wool
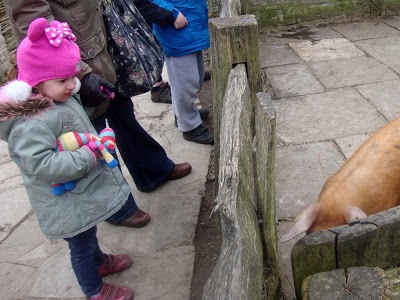
The pigs are curious about Stripy Horse
In addition to the cows, M met ducks, goats, pigs, more chickens, geese (including a feisty trouble maker called Reg) and sheep. All were greeted with a wide grin and much chatter on M’s part. Her companion for the outing was Stripy Horse, who met a real horse who M was a bit uncertain about, possibly because its head was almost as big as she was. Despite her natural cautious inclinations, the horse was the only animal M wanted to touch and she stroked its mane very gently. The horse in turn tried to sniff Stripy Horse which M found funny if a bit disconcerting. The pigs also tried to sniff Stripy Horse, but M had learnt from her experience with the horse and kept Stripy Horse well out of reach.

We went into the main house where there was a cooking demonstration and M noted that the lady was cooking on a fire. She also helpfully pointed out that the lady might need some more sticks.
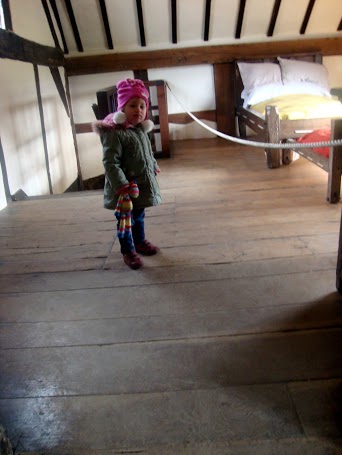
Exploring the main house at Mary Arden's Farm
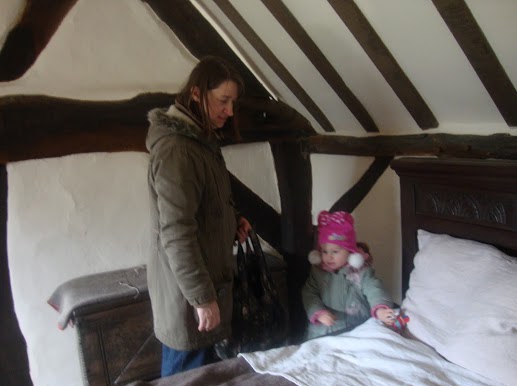
We explored upstairs where the solid timber floors sloped in many different directions and the doorways were very low. There were some beds made up including a pullout cot complete with a rag doll tucked under the covers. Stripy Horse saw the doll and wasn’t to be left out, trying out one of the beds himself and a couple of bed rolls.
Stripy Horse tries out a bed
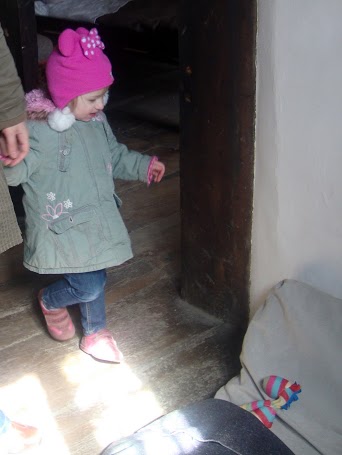
Stripy Horse tries out a bed roll on the floor
He was a very cheeky Stripy Horse.


There was even an adventure playground, complete with a swing which a very cold M thoroughly appreciated. The slide was a bit steeper than anticipated though and a surprised M was launched through the air at the bottom, landing a few feet away! Fortunately, M took this unexpected flight in good spirits, scrambling to her feet and ran off chortling but did say she’d do something else now.

Easter Bank Holiday Monday I was very tempted by the open day at Toft Alpaca Farm, the yarny in me wanted to touch fibre and there was cake, need I say more?

M had a prior engagement and it is still early days for my plan to corrupt her to love all things textile related, so no alpacas for me. Instead I escorted M to a birthday party, where she was introduced to the idea of a bouncy castle.
Photo
Bouncy castle!
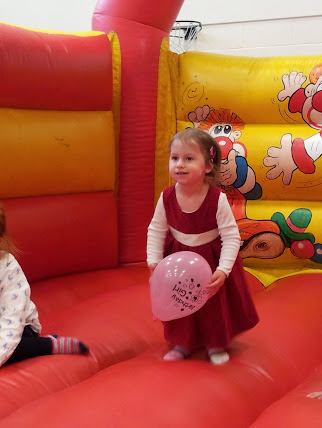
Bouncy castles and balloons... A good combination which even topped ice cream!

Monday, 4 March 2013

Meet Puff the Dragon

I’d like to take a moment to introduce you to Puff.
Meet Puff the Dragon
Puff is a dragon and he was made for Dave by his mother, probably before 1983, although Dave cannot be absolutely certain. Puff has stayed with Dave all these years, although he says he was stolen for a brief while after Dave returned from University. As you can see, Puff is a fine specimen of a dragon, but whilst Dave is very fond of him, he has spent a good few years snoozing on top of a wardrobe. His peaceful retirement ended when M spotted him a month ago and asked:-

What’s that?

Puff was duly retrieved, admired, explained, dusted off and promptly adopted by a happy
M.

Once you take a careful look at Puff, you can certainly see why he is so endearing. He’s big to start with. Heavy and very well stuffed. Puff is a toy with presence, gravitas, charisma.

Construction wise, he’s complicated and heavily sculpted, one limb having as many as 13 pieces carefully sewn together. Trim has been carefully applied to give the impression of teeth. His tail still curls around suggesting he once had an adequate counter balance so probably stood on his back legs. The remnants of broken wires can be felt through his once fully posable claws. A reinforced padded tongue lolls out of impressive jaws. His underside is quilted. He still wears his original collar along with name tag. Puff represents many hours of careful sewing, love and attention to detail that my mother-in-law poured into him.

Lack of opportunity and time may have deprived me of my sewing machine, but I can’t help myself when I see something this beautifully, lovingly made. I need to know how Puff was made!

Sadly, my mother-in-law is no longer with us, so I couldn’t quiz her. I asked Dave instead. He told me Puff came from a pattern in a book he had browsed through many times. He said his mother also made a dinosaur called Posh Paws and he admired something called a Heelow Monster (which turns out to be a large American lizard - the gila monster - I live and learn).

Posh Paws I was told, starred in a children’s television show called Swap Shop that Dave loved for its dinosaur content. I didn’t get to watch much television as a kid, so I just nodded. Apparently Posh Paws was this huge purple dinosaur and Dave’s Mum made him one which he promptly loved to death. My mother-in-law, ever ready with her sewing machine made him a second one to replace the first.

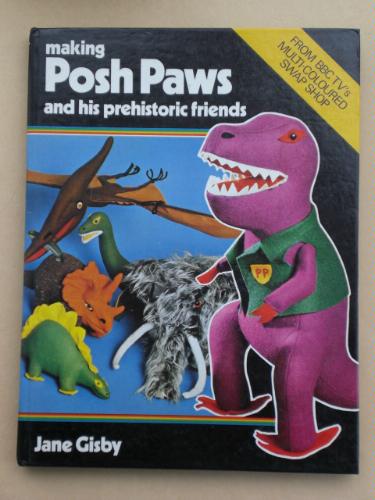
A call to my father-in-law revealed a partial title of the book the pattern these three toys allegedly came from - Posh Paws and Friends - which I quickly resolved to Making Posh Paws and his Prehistoric Friends by Jane Gisby, published in 1978.


Cover photo from Amazon.co.uk
Alas, Dave took one look at the cover and shook his head. Apparently the book he was thinking of had Posh Paws and Puff on the cover beside some little rocks.

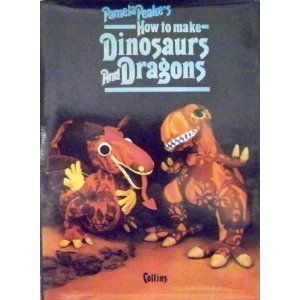
At this point, all I had to go on was that Dave would recognise the cover, it had dinosaurs and dragons in it and the book must have been published before 1982. The search engine at AbeBooks came to the rescue revealing How to make Dinosaurs and Dragons by Pamela Peake (1976), which doubling back to Amazon revealed the cover:-

Cover photo from Amazon.co.uk
That’s it!” cried Dave.

But is it?

Dave then said there may have been a third book with the gila monster in it. However, no matter how you look at, that is Puff on the cover so this book would answer the question of how to make a toy similar to him. Not that I want to make a replacement for Puff, he represents Dave’s past and is a link to his mother, who we both agree would be delighted that M thinks so highly of a toy she made all those years ago.

Still my wishlist has several new additions to it; I not only added the two books above but a couple of others from Pamela Peake who certainly seemed to know her soft toys.

For those who might be interested, take a look at:-

Creative Soft Toy Making - Pamela Peake (1974) (I swear that’s Humpty Dumpty off Play School on the cover!)
Making Soft Toys for Children - Pamela Peake (1988)

While undisguisedly vintage, the reviews are good and as the books are instruction manuals I’d hope they’d be as relevant today as when they were published.

Puff sleeping in the living room and accidentally wrapping his jaws around Snake! (3 March 2013)

And now I’ll leave you with another picture of Puff, who no longer sleeps on top of a wardrobe.

Friday, 31 August 2012

Meet Douglas

I may actually be along with a crochet related post fairly soon having managed to finish a project at long last.

In the meantime, please let me introduce Douglas.

Douglas helps M and Baby to do some drawing.

Douglas is a bag puppet which M made herself. I spotted the idea over on An Ordinary Life? a few months back and have been waiting for an opportunity to let M have a go. I sold the idea as doing some sticking which caught M's imagination along with the googly eyes when I dug them out of the craft box.

The aim here was to end up with a recognisable puppet but allow M to take as much creative ownership of the project as possible rather than sitting there and guiding her hands.

I prep'd the bag by applying strips of double sided sticky tape to the top and in approximate locations for the eyes. After that I pre cut lengths of yarn for hair and applied liberal amounts of glue stick to the rest of the bag.

I explained to M that we were making a puppet, showed her the bag, pointed out the sticky tape and then let her loose with googly eyes, yarn strands and various bits we have on hand for sticking. M had fun sorting the eyes for a few minutes and then got stuck in, making Douglas's face with careful consideration. She even made him two hair clips to try to tame his hair.

When M had finished we admired the new puppet and M declared:-

"It's a puppet. It's Douglas. Called Douglas."

And so he was named.

Sunday, 1 April 2012

What to do with a chocolate egg

Easter is nearly upon us and this weekend I remembered that we still had a chocolate egg left over from _last_ year. This left me with a dilemma of whether to force feed M (or indeed Dave) chocolate or to do something more creative with it.

I was thinking of attempting to make biscuits or cookies, but was thwarted by the oven deciding to blow up.

The oven dying in a dramatic fashion was unrelated to my baking aspirations. There was a local power surge, the oven was on, it went bang and that was the end of our supper. It's been a bad month for appliances, with the washing machine springing a leak early in March. Still, at least this time I have insurance!

Back to the left over chocolate.

After a little thought I decided to try my hand at Rice Krispie (TM) cakes. I don't really bake that often and have never actually tried making these but the idea seemed simple enough. I googled a little to see how others had done it and then made my own, aided and abetted by a small child.

Ingredients

  • Approx 125 g of Cadbury's chocolate
  • 1.5tablespoons of golden syrup
  • Approx 25g non salted butter
  • .5 teaspoon vanilla essence
  • Approx 4 mugs of rice pops (supermarket own brand)
  • Some sprinkles to decorate with


I broke up the chocolate egg and placed it in a Pyrex bowl suspended over hot water to melt.

The butter also went in, along with the syrup and a little vanilla essence. I stirred and prodded the chocolate mix until I had a shiny almost smooth mix.

I helped M into her booster seat where she took charge of the rice pops. Not quite seeing the connection with the chocolate sauce, M began tossing the rice pops around with much glee whilst I decanted the chocolate into a mixing bowl.

Intervening in the rice based fun, I showed M that I wanted to add the rice pops to the chocolate, which she happily did. I added some more rice pops to make up for those lost to the floor while M got in there with a wooden spoon.

Things were mixed together. M discovered that rice pops in syrup/chocolate are very sticky and don't fall off a spoon easily. We then went on to find out that they are not that easy to spoon into bun cases. Personally I think it would be easier to spoon the whole lot into a baking tray or shallow dish and cut into pieces later.

Once decanted into bun cases, we decorated with 100's and 1000's type sprinkles. I put some sprinkles in a bowl and let M loose with a spoon. Much fun was had. Some sprinkles went into M. A lot of sprinkles went onto the floor. But between us we did get sprinkles onto the cakes!

M and I add sprinkles to the chocolate crispie cakes


The resulting cakes were very tasty, still slightly soft rather than completely set and easy to eat, rather than the type to break your teeth on.

Very easy to make and child friendly, except for the boring melting of chocolate bit.

Finished cakes


Yummy. I will have to make them again.


Wednesday, 15 February 2012

Dotty Valentines Cards

A few weeks back I decided it was time to introduce M to the heady excitement that is arts and crafts as done at home, as opposed to anything organised by the nursery.  With this in mind, I started stocking up on suitable arts materials, aided and abetted by a 50% off sale at the Early Learning Centre.  I also started looking into potential projects or activities that would be suitable for a small person of M's age (currently nearly twenty months).

In my wanderings through the interwebs, I came across many crafty things and started cataloguing them over on Pinterest for anyone who may wish to take a look.

In particular I came across this suggestion for a Valentine's Card on Sunhats & Wellie Boots (which I highly recommend), using a simple template to stencil a design in relief onto a card.

It caught my eye, I pinned it and then I set about gathering my supplies.

Supplies needed:-
  • Card
  • Some scrap paper
  • ELC Easy Painters
  • One small child
  • An arts apron/bib for small child
  • A mummy or other suitable adult to assist
  • Scissors
  • White tack or similar temporary sticky substance
  • Glue stick
  • Lots of newspaper
I started by covering out kitchen table with a newspaper, something M immediately recognised from our earlier trial run a week or so ago with the easy painters.  Excitement filled the kitchen as she loudly declared "PAINTING! PAINTING!" and tried to climb into her booster seat. I helped her up, strapped her apron (which most definitely is NOT a bib) on and handed her the easy painters along with some sacrificial paper while I carried on preparing stencils and cards.

The ELC easy painters are an interesting idea, they're bottles of premixed and watery paint with a sponge applicator. They need shaking vigourously to mix the paint before working with them, but that's about it. The sponge applicator means the paint pretty much stays inside the bottle until applied to something; if dropped onto the floor with enough force there will be a little splatter but only a few drops which are easy to clean up. The first time I showed these to M she was a little hesitant but quickly got the idea.

Easy Painters in action

On this occasion, M got to work enthusiastically, happily decorating the newspaper covering the table and occasionally aiming at the sacrificial paper.

In the meantime, I cut out two heart templates and stuck them to the front of some folded card using some white tack. Once prepared M and I got to work spotting paint onto the cards.

There was a brief moment when M considered ripping the heart template off the card but she decided painting them was more fun once she saw me having a go as well. At that point M got stuck in, happily painting her card and even working on the inside. I gave her the heart innards which she decorated as well, and even took my card to add her touch to it, thoroughly enjoying herself in the process.


A short while later we had painted valentines cards which I duly rescued as M declared she was finished with the paints and moved onto crayons.

One of the cards just after it had been painted and before drying - you can see the heart template still in place and covered in paint
One of the heart shape cutouts which M very prettily painted - I think this one looks a bit like flowers!


We put the cards aside for a couple of hours to dry and then carefully peeled off the hearts.  I decided to use the painted template and the innards on the inside of the cards which I thought was very effective.


And this one is M's, entirely her own work except for the cutting and sticking bits.

M's card, I love the way she deliberately placed the colours
M chose to add paint to the inside of her card too

Not too bad for our first go at a 'structured' activity, as opposed to just letting M loose with her creative side and a piece of paper. 

M deep in thought choosing which colour to add next
M deliberately placed her dots with a great deal of thought and concentration, she even overlaid the heart innards to get in some additional stencilling.  She also had fun with her fingers, blurring the edges of the dots to give a softer edge. I guess this comes under colour play, colour recognition, fine motor control and sensory play since she also got stuck in with her hands.  Most of all though, it was fun and M was equally pleased with the result as I.