Tuesday, 8 December 2015

We became lanterneers

With Christmas fast approaching, we look for fun family things to do and I was delighted to stumble across the Leamington Lantern Parade last week. Apparently this event to "Light Up Leamington" has been running for a five years, but living in Coventry we had never heard of it.

I checked out the link, expecting a few people wandering around with tea lights in jars, only to find it was a proper Christmas paper lantern parade. Just look at some of the pictures from previous events to see how fabulous it is (linky).

Dave agreed it looked fun, but with the short notice we weren't sure if we'd be going as 'lanterneers' or spectators. Determined to have a go, I gave the parade organisers a call on Thursday to see if they had any lantern kits left, which they did. On Friday, M and I set off to find the organisers office and buy some bits for creating our own fantastic lantern.

A lantern making kit turned out to be a selection of coloured tissue paper (which I supplemented from our craft supplies), wet strength white tissue, some willow withies, masking tape and a torch.

At home, M got straight to work designing her lantern and decided we should make a ballerina. 

Several drawings later and M had her design concept, which I converted into a wicker outline.
M's original design.
My interpretation in wicker.
Saturday M had her usual dance class, and after lunch we got on with the serious business of lantern making.

I say 'we' in the genuine sense as even though technically I'd disappeared upstairs to make a start on Christmas wrapping, I kept popping down and helping. Dave had the task of securing the withies into a suitable frame following our design. Garden wire was used to form a bun on the back of the ballerina's head. I showed M how to apply PVA/water (in a 50:50) solution to the wet strength tissue and Dave wrapped it around the frame.

Once we had two layers of wet strength tissue, it was time to bring the ballerina to life with layers of normal coloured tissue paper.

Anyone who has ever worked with normal tissue, will tell you this stuff is very delicate and prone to disintegrating when wet. I showed Dave and M how to cut the tissue paper into strips, apply glue to one strip at a time before gently adding to the ballerina. Sponge brushes are essential for this task and I think this was the most nerve wracking part of the construction process.

Dave and M worked all afternoon and well into the evening, with my help as needed. The torch was attached to a toilet paper tube in the ballerina's middle and we decided to tape some electric tea lights under her tutu, to give a little extra glow. Dave applied large glitter flakes to the skirt and a bit of ribbon completed the waistband.
The ballerina lantern in my kitchen.
The ballerina was still drying on Sunday morning as we did our best to manoeuvre around her in the kitchen and the glue was barely dry when I put her in the car to drive to Leamington. This is what I call cutting it fine!

And here she is, with M standing beside her for scale.
Just before the parade, a picture showing how big the lantern  is beside M/
We made our way to the meeting point for the Lantern Parade at the band stand in Leamington Spa's Royal Pump Room Gardens, joining over two and a half thousand other participants. Christmas songs played and a festive atmosphere filled the park as we waited for the nod to form up to walk through the town.

Finally we began to move, slowly and in procession, we assumed a position towards the middle of the column as it formed up. At the point we crossed the road to leave the park, I looked back to see lanterns still snaking across the gardens behind us all the way over to the Pump Room. There were a lot of lanterneers.
Our ballerina lantern, lit up and sparkling.
Here is a video clip from the front of the procession: https://www.youtube.com/watch?v=0QLPnr1uP_g

And a longer one here, showing everyone walking past, but unfortunately we are barely noticeable as we're hiding behind a giant star.

Finally, taking it in turns to carry our ballerina, we walked up the hill, around a corner and back down, past market traders and the people of Leamington who had gathered to watch. I saw several people point at our lantern and correctly identify her as a ballerina, which was very satisfying. At the Town Hall, we made our way to the shelter of the Christmas tree to join in the carolling, before returning slowly to the car.

So ended our first Lantern Parade, which was a fun but mad scramble to put together a suitable lantern so we could join in. Next year, we need to  start our construction phase a couple of weeks earlier!

Useful Links:

Tuesday, 1 December 2015

A knitting and crochet catch up

It's been a while since I've posted here, mostly down to life getting busy, meaning I just haven't had time to collect my thoughts enough to write. It was only when I popped onto Ravelry to update a project that I realised how lax I've been. Ooops!

I thought I'd do a quick round up of some of the projects I've been working on over the past few months, which means casting my mind back a bit as I try to recall...

I went on a glove knitting drive towards the end of the summer, preparing for winter. I started off with gloves for M, adding to her dwindling supply of pairs that fit with ones that don't fit because they're a bit on the big side. I am currently embracing the she'll grow into it theme when making things for M!
First attempt at gloves.
I'd never made gloves before, so this was a steep learning curve which is why I started with a practice pair, intended for no one in particular. I picked up a book called Gloves by Sussette Palmer, working through the pattern for  'Childs Play' gloves and treating it as a tutorial (link to my Ravelry project) .

As these were for 'playing' purposes, I didn't worry about gauge or fit, concentrating instead on the process of what it was I was trying to achieve, namely learning how to knit fingered gloves. The result is OK, all things considered, but they won't fit anyone in this house, so I may end up passing them on.

The tricky bit with gloves has got to be the fingers, knitting such small tubes and keeping the tension even was difficult. I don't think I got it right and I had issues with ladders between DPNs, something that mystified me because I don't recall having problems the last time I worked in the round. It took me until the ninth finger to find my groove, so I tried again this time with a pair of gloves for M.
Finger gloves for M.
These were made exactly to M's specifications, but I upped the sizing a little so they should fit for a year or two. M loved them. I like them, but wasn't completely satisfied with the thumb. Tricky things, thumbs. My Ravelry project for these is here.

Not to be deterred, I also made M a pair of mittens (here on Ravelry).
Mittens for M.
The mittens were made using the Pretty In Pink pattern from the Gloves book and there were a couple of errors in the pattern. i.e.
  • When working the last row of the frill (R5), the pattern says ”k2tog to the end”. R1 starts on the wrong side, so R5 needs to be purled, hence the instructions should read ”p2tog to the end”.
  • Following the instructions for the thumb gusset will give 15 stitches to save off on waste yarn, not 13 as specified in the pattern. If do you want 13 stitches, increase until there are 11 stitches between your increases. (Personally, I liked the 15 stitches as it gave a nice roomy thumb.)
These definitely are too big. An (albeit small) adult visitor tried them on  and declared they fit her, which gives an idea of how big they are, but I like them and they'll fit ok in a year or two.

So I made another pair of mittens (on Ravelry here)...
Mittens for M.
M liked these ones and the fit is better. Still on the large side, but more wearable I think.

Lesson learned here - I really do need to work on how big, is too big and how big is just a bit of growing room for small people.

Next, I used some left over yarn to make a pair of gloves for me (Ravelry link).
Gloves for Me.
This time, I worked without a pattern and I sized exactly for me. I have long fingers and shop bought ladies gloves are usually too small, so this is the first pair of gloves I've owned that actually fit. I tackled my dislike of the thumb in this pair, offsetting its gusset by 3 stitches, meaning I have a left and right glove.
M said she liked these too, but I insisted they are for Me.
Hopefully, they'll see some good use this winter.

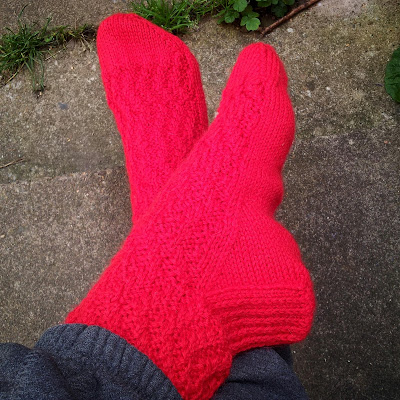
Next up, I tackled socks (here). It has been a long, long time, so I made a pair of bed socks/slippers for me.
Bed socks for Me.
Again, no pattern just me trying to remember what to do and while I'm OK with how these turned out, they are too big. Where there was some rounding up needed for pattern purposes, I went up rather than down which means the sock is much looser on than I'm happy with. They're OK for bed socks, but if I'd intended these for regular wear I'd have been disappointed.
A bit big, but fit for purpose.
Next I went on a hat making binge, making up three nearly identical hats except for the striping pattern.

The first hat was for M (Ravelry link), with the young lady herself choosing the colours and yarn. She also helped me with the striping pattern. I used a 100% wool Sublime Yarns Natural Aran and while it might have purported to be aran weight, it wasn't consistently so. Deliciously soft it might have been, but the yarn went from fat to thin and in some places becoming very skinny indeed, which meant I couldn't hit gauge for the pattern I used (which was Lindsey Carr's Seamless Earflap Hat)
M's new hat for winter.
In the end I picked a hook that worked (5mm), swatched to work out the tension and subsequent gauge, then recalculated everything accordingly. All of which means, I mostly used the pattern to get the proportions right.

M loves this hat, even if again, it is too big for her. She'll grow into it, right?

Finally, we have Blue Bed Socks for M (Ravelry link here).
And finally, bed socks for M.
Again, this is my own pattern and are hot off the needles this weekend. I used 4mm DPNs and stash yarn, using a simple 4x2 rib and shifting it either left or right every seventh row. The result was effective and M approves, although she has yet to put them to the test.
Fresh off the needles.
And that about brings us up to date, with the knitting at least!


Sunday, 23 August 2015

And then there was a tutu

Yesterday really was a hot, sticky sort of day. Really it needed some rain to clear the air, but sadly this didn't arrive until today, coincidentally a few minutes after I'd pegged the last item of laundry onto the line to dry!

After a morning in the park, I settled down for an afternoon of sewing. With only two weeks left until the start of term, I had a tutu to make.

M had already designed her idea of the perfect tutu. We chose suitable tulle together. We visited Hobbycraft for sewing supplies a few weeks back. All I had to do was make a five year's vision reality.

I started on this project two weeks ago, getting a little distracted last week by the need to make a tutu for a horse, but with a deadline looming I wanted to plod on with it yesterday in case something went wrong. I'm always a great believer in leaving yourself time to fix things, rather than having a disaster on your hands at the very last minute.

Last weekend, I'd cut and gathered my tulle, all two hundred pieces of it, securing it to a piece of bias tape. M's chosen colours are pink and turquoise, and she specifically wanted vertical runs of colour, going from waistband to hem, hence I used 15cm rolls of fine, soft tulle. I decided to make the tutu slightly longer at the back, so cut 32cm strips for the front and 35cm for the back. I gathered each strip individually, in a sequence of two, so two pink, then two turquoise, then two pink, etc...

This took a long, long time.

Once the gathers were done, I cut a piece of bias tape 11cm bigger than M's current waist measurement. That was 8cm ease, to get it over her hips and up to 3cm seam allowance (SA). I marked the SA, then pinned the gathered tulle in place, adjusting as I went. I'd gathered in three pieces, one for the front and two for the back (allowing for a centre back join) because it allowed me to control the gathered fabric's distribution.

Pinning the tulle in place was fiddly, mostly because the stuff has a mind of its own.

After that, I sewed it in place very carefully, repeatedly stopping to move the tulle away from the needle and feed dogs, keeping everything as tidy as possible.
Securing gathered tulle to a piece of bias tape.
Yesterday, my task was to add the waistband to the resulting proto-tutu.

My waistband is made from two pieces of satin ribbon, sewn together along once side, pressed, then sewn to make a loop.

I pinned the gathered tulle into the waistband, sewed it in place, folded over and secured it by sewing again, leaving the last 15cm unsewn so I could insert the elastic. I decided to use woven elastic as it is suited to heavy duty waistbands, which seemed appropriate for dancewear.

My hope had been, that by sewing the gathered tulle onto tape first, I'd tame it a little before attaching it to the waistband. I'm not sure I was successful, as it was still really fiddly to get the tulle pinned in place and very slow, careful stitching was required with the sewing machine.

The elastic was a tight fit to the resulting casing, which was why I'd left such a large hole to insert it. I'm glad I did, because some wrestling was involved! I secured the elastic, first to the inside of the waistband, and then to itself, before closing the casing by hand. I had intended to sew it with the machine, but the fit around the elastic and gathered tulle was so tight, I couldn't be sure I'd not catch the elastic, so sewing by hand seemed the safer (and quicker) bet.

Casing closed, a bit of wriggling to evenly distribute the tulle around the elastic and finally I had a finished, wearable, extremely floofy, full tutu. Just as M had planned.
The finished tutu.
Back and side view of the tutu.
Cue a very, very happy little girl.


Saturday, 22 August 2015

Of parks and potatoes

We received an email at the beginning of the week from the gardeners at Allesley Park Walled Garden, telling us the potato we planted a few months back was ready to be dug up. The gardeners had planned to dig them up on Wednesday, but as I was at work, I decided to go with the alternative date of today. So it was that we hustled M out of the door and drove over to Allesley for the second week running, so she could dig up her potato.

We arrived to a garden full of happy gardeners bustling around what has to be one of the lushest gardens I've ever seen. The walled garden has very good soil and a happy group of volunteers to work it. We announced we were directed to someone who knew what we were on about, and were told we'd need to identify which potato was ours.

I spoke up - "Number 38."

Which raised eyebrows, apparently I was the first parent to remember, but as I said, I had taken a photograph!
Here lies M's potato.
A woman with a clipboard came along, saying that all we had to do was look up M's name which she did, saying "Ah, we must have M."

In a few moments, we were looking for No. 38. It took us a few minutes as the beds were overgrown and not that many potatoes had been dug up. It seems that heavy rain on Wednesday meant not many children came to dig up their potatoes and we were only the second family to stop by this morning.

The soil was turned over and within a few minutes, we had potatoes!
Potatoes!
A happy girl with her potatoes.
The job done, we spent some time looking at the garden, admiring the plants and the flowers which had been planted for the bees. M loves the vivid colours of the wild flowers, so we spent some time here.
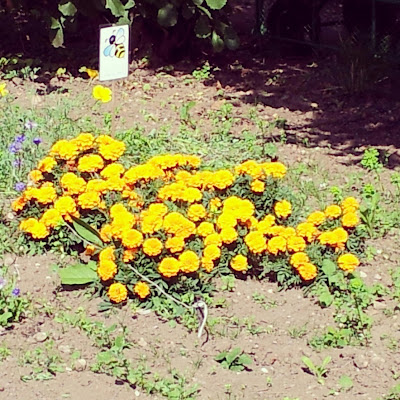
Yellows.
Beautiful red poppies.
Pinks and purples.
Reds.
Purples.
White.
And of course, lavenders.
M was very excited by the sunflowers, as ours were eaten by pigeons.
When we finally tore ourselves away from the walled garden, we strolled around the park, looking at the wild flower meadow again. This time the thistles were covered in down, so M spent a lot of time launching the downy seeds into the air and blowing them.

After that we found a 'feral' apple tree. Feral, in that it was in a park, but not feral as in this is managed parkland, so presumably the Council know the tree and many others are here.
Examining the park's apple trees.
It was an impressive looking crop though, and I'm curious as to what happens to the fruit in our parks.
Still small, but definitely apples.
After that it was time for a play in the park before heading home for some lunch.

Useful Links:-
http://www.allesleyparkwalledgarden.co.uk/


Tuesday, 18 August 2015

A tutu for a horse

There has been a lot of talk about tutu's in our house over the past couple of weeks, as M prepares for next term's dance classes. I've promised to make M a new tutu, to her specification, and so I set to cutting and gathering tulle in earnest on Sunday.

I had hoped that Dave might take M out for a bit, but she had other ideas and so we started working on another tutu project for her toy horse, Neigh.

A rummage in my scrap bag turned up some net curtain I'd bought many years ago as a floaty overlayer for a gown. This turned out to be an ideal choice for a horse.

We measured Neigh, with M carefully writing down the horse's waist and 'hip' size, as I demonstrated with the tape measure that the tutu had to open far enough to go over the toy's bottom or it would be impossible to get it on or off. M observed that Neigh has a big bottom and was worried this would make the tutu loose, but I said not to worry, we'd use some elastic.

Ah, elastic. This is a mysterious substance that I have minimal experience of and when I have used it, I've never been that impressed. As I want to add elastic to the back of M's tutu, I felt working with elastic for a small toy might be good practice.

We talked about how long M wanted Neigh's tutu to be, settling on 15cm as it was easy to find a small rule to match the size. I handed M a pair of pinking shears and suggested she cut strips of net curtain but it turned out the shears needed more oomph than M possessed. She managed to cut a little, but in the end asked that I do it.

I threaded up an embroidery needle with buttonhole thread, then showed M how to make a running stitch to gather up the net. M made a valiant effort while I resumed cutting tulle for her tutu. Lots of 'Oh dear's followed as the needle was pulled off the thread, prompting me to suggest M rethread it herself if she could... Much excitement followed when M did indeed manage to thread the needle herself, only to pull it free of the thread again on the next stitch. M persevered for about 30 minutes, before handing the little tutu to me, so I could finish gathering the remaining pieces of netting.

Next up I found some ribbon, showing M how to fold it to make a casing, which I then sewed into a loop, sized to go around the toy horse's bottom. M handed me pins and I attached Neigh's tutu to the ribbon. I asked M if she would like to sew the waistband herself, but she declined, watching me closely instead.

I could tell M was impressed when she eyed the sewing machine and suggested "Do you think the sewing machine needs its own tutu?"

A short while later, the net was sewn in place, the casing flipped over and secured with a gap for the elastic to be threaded in. The elastic was cut to fit Neigh's waist, with a little extra for a seam allowance. This was wrestled into place and sewn together before I closed the last little gap.
A finished tutu, made to fit a horse.
Cue a happy little girl and a happy toy horse.

Monday, 17 August 2015

Flowers and paint

The park called on Saturday morning, where we stopped by the market at Allseley Park Walled Garden. I almost bought yarn, but was distracted by cake at the last moment. Whether this was a good or a bad thing is still up for debate!

We stopped by the potato beds, to visit M's potato which we'd planted earlier in the year but couldn't see the marker under the overgrown bed. We'll hopefully go along to dig up any resulting potatoes later this week, so fingers crossed we get a crop.

Yarn stroked, cake eaten and potato visited, we continued our walk around the park with the highlight for all of us being the wild flower meadow. Coventry has taken to seeding unused parts of parks, grass verges and roundabouts with wild flowers, something I heartily approve of. Allseley Park was in full bloom, presenting us with an impressive field of colour.
Wild flowers in full bloom.
M was particularly impressed with the vivid pinks and oranges, insisting that I take several pictures.

M was particularly drawn to the colours in this clump of flowers.
Can you blame a girl for loving these colours?
Just beautiful.
We also stopped by the pond, startling a family of moorhens who sped for the cover of the reeds, only coming out again when they were certain we weren't going to do anything dangerous. Looking at the rubbish other visitors had thrown into the pond, I fear they were right to be wary. We were on the lookout for newts, newtlets and froglets, but alas saw none. We did spot a fish in the water, but my phone's camera was unable to pick it out.

After a play in the playground, we headed home for some lunch. Later, inspired by all the colours
we had seen, I suggested M could do some painting. I'd been keen to show M how wax resist worked with watercolours, but our crayons needed a firmer pressure to transfer enough wax to the paper than M was able to manage on her own. Hence this turned into a collaborative project, with me drawing the wax designs sometimes by my own initiative and sometimes under M's careful direction. I painted a couple of sheets myself, but these are mostly M's creations.
Wax resist and watercolours.
Wax resist and watercolour.
The idea was to draw geometric designs in wax crayon, then paint over the top using watercolours, followed by a wash of water. M's use of colour is vivid and she found the effect of adding a water wash interesting.

Wednesday, 1 April 2015

Felt planetary bodies

Looking back over the past few weeks, we enjoyed a partial eclipse in the UK on the 20th March. Predictably that morning was cloudy, so while it went semi dark, the birds stopped tweeting and the light levels were odd, that was as good as it got.
An eclipse viewed through cloud.
We had however been prepared and had a sheet strung up between the tree, swing frame and washing line, ready to project the sun onto by various means (the colander was the most impressive). We also made pinhole projectors out of cereal boxes.
The cloud parted and we saw this in our pinhole projectors.
Not to worry though, as an eclipse meant lots of talk of the Sun, Earth and Moon and an excuse to craft in felt.
The Sun, Earth and Moon - in felt.
This was the first time I've tried to make planetary bodies out of felt and it was not as easy as I'd hoped. Indeed, it took two attempts to make the moon, as I originally tried to use two layers of felt, one white with holes cut in it glued over a grey layer to try to simulate the Mara. The result of applying glue was felt too stiff on this scale (about the size of the bottom of an egg cup) and I couldn't push a needle through to sew the two halves together!

A lesson learned there.

The Sun was a straight forward pair of circles, the size of one of M's plates, with triangles of felt sewn between the layers. Very easy but effective.
The Sun in progress, together with the Earth.
The Earth was more difficult. M loves Italy because it is boot shaped and believes it should feature prominently on any physrep for the Earth.  I used the bottom of a mug to draw the circles and had to sketch out land masses to fit on a piece of paper. I cut these out and pinned them to the green felt so I could cut around it. Each continent was glued in the appropriate place to a blue circle and then top-stitched to keep it in place.
The Earth in two halves.
The set took me two nights to make up and M painted a bag for them to live in.
M paints the solar system onto a canvas bag.
The vague plan is to make an entire solar system... Eventually.

Monday, 30 March 2015

A dress for Miss Sophie

I'm playing catch up here, trying to remember the things we've done which were blog worthy while I was immersed in Richard III. This post is one I wrote a few weeks ago but never got around to publishing here.

-----

We've been doing a lot of work with shapes lately, looking at how to use shape stencils to make pictures, playing with magnetic shapes, talking about relative size and measuring shapes on graph paper. I wanted to tie all this together in M's mind with a fun activity, focused on her love of drawing tutus, so I talked to M about needing new clothes for Miss Sophie Bear.

Miss Sophie is a simple knitted bear I made for M last year, complete with a selection of her own clothes. I think it is fair to say that M loves Sophie and she is well played with, not least because she is dressable which M loves to do. Asking M what kind of new clothes Sophie Bear would like, opened the floor gates to many impossible designs which wouldn't have looked out of place on a designers runway.

After allowing M some time to draw fantasy clothes, I explained that while they were fun to look at, could she see Miss Sophie wearing them? Playing in them? Or dancing in them?

M sadly acknowledged they were not very practical.

I asked M if she would like to draw a real dress and we would see if we could make it? This was greeted with much enthusiasm, so we got to work.

After explaining that while I would happily knit Sophie some more clothes, it would take a long time I asked M for suggestions on alternatives. We eventually settled on sewing as a possibility and M grew very excited when I revealed I do actually own a sewing machine. I also admitted I own more than one sewing machine, they sort of multiply... But I hadn't used one since before M was born, so my sewing skills were a little rusty.

First up, I dug out my scrap bag and let M rifle through it, watching with some concern as she pulled out netting and sheer organza scraps to show to Sophie Bear. I had visions of having to sew two slippery, sheer fabrics together to make some sort of puffy dress! After a while and a lot of dancing around with a bear draped in various fabrics, M finally settled on two fabrics. A firm but medium weight blue calendared cotton and a lightweight burgundy silky fabric which would have originally been used for lining.

M explained the blue cotton was firmer, more structured and should be an under-dress as it would support the thinner, more floaty burgundy fabric which would sit on top. I asked M to draw a picture of what she had in mind, which I then reinterpreted in a simple sketch so I could confirm I'd understood what she was after.

Together we measured Miss Sophie Bear, taking down her sizes and learning how to read a tape measure. M had lots of fun playing with the retractable tapes and measured Sophie several times to make sure we'd got the details right.
Measuring Miss Sophie for her new clothes.
With Miss Sophie's measurements on paper, we drafted our pattern. M and I looked at some of M's clothes, studying the shape, the seams, how they were put together. We used 1 cm grid graph paper and rounded all measurements up to whole centimeters and worked together to transfer the measurements taken earlier to the pattern. I kept it simple, Sophie's arms are 'T' shaped, so I decided this dress could be 'T' shaped too with nothing complicated for the sleeves. I added a seam allowance and after watching me for a while M felt confident enough to draw in some of the lines herself.
Drafting our pattern.
There was an odd moment when M told me she was worried and scared about making the dress; she said she was afraid it would go wrong. I gave her a hug and reassured her that I understood her concern and if we were using expensive fabric I'd be a bit anxious too. However, as we are using left over fabric there was nothing to worry about. If things went horribly wrong, it would be a bit disappointing and we'd have lost a little fabric, but we would have learned lots in the process which would mean that next time we'd do better.

We were finally ready to cut out our pattern and then our fabric pieces.
M cuts out our pattern pieces.
Our pattern cut out.
It took us a long, long time to get to this point so I called a halt for a couple of hours so M could recuperate a little. Once she was ready, we got the sewing machine out, dusted it off, threaded it up and I began to sew. It was a bit hair raising, I have to say. M was watching closely, trying to supervise and I had to keep reminding her to keep her fingers out of the way! I've also never sewed anything this tiny on the sewing machine and the burgundy stuff was a nightmare, refusing to stay where it was put. Ideally I should have adjusted the tension, practised and perhaps tacked first so the dress pieces were easier to sew, but with M hovering I wanted to get the job done quickly.

It took me at least an hour and half to sew this little dress together. I edged the burgundy stuff first to stop it from fraying. The blue fabric I pinked much to M's amusement as she decided my pinking shears had a silly name and looked like monster scissors. Normally I'd have pressed the seams, but again I skipped this for speed. A press fastening at the back allows the dress to be closed at the neck.
Miss Sophie, modelling a dress as designed by M.
M was very excited and ran off with the dress as soon as the last stitch was placed. A job well done I think.