 |
| Simple baskets woven on plastic milk bottles. The handles are also made from milk bottle. I've used Duck tape on the tops and handle to finish. |
A while back, Dave bought me a book called Weaving Without A Loom (Sarita R. Rainey). Now due to life busy-ness, I've not really had much of an opportunity to try any of the ideas in this book, but with M getting a little older and following on from last week's baskets, I wanted to try some of the easier projects to see how she got on.
I decided to start with paper weaving, as the supplies are readily available around our house. We had a go at home so I could give M one to one attention, before taking the same craft to group the next day.
The idea is simple, we drew an outline in crayon onto a piece of construction paper, incorporating an area in the design to weave and representing it with parallel lines. The lines don't have to be regular in shape or length, they are there to be woven into. The design was cut out and the lines were also cut, making slits.
If I was doing this on my own, I'd have probably used a craft knife and mat, but doing this with M we used children's safety scissors. The lines weren't as crisp, but more than acceptable.
For our first attempt, I suggested we make trees as we are doing a project on trees at the moment. I also thought the shapes would be easy to draw and incorporate some weaving.
Once the design had been cut out, we cut some strips in a contrast colour and wove them through the slits. The ends were secured with a glue stick, then the whole thing is glued onto another piece of construction paper.
 |
| My design is on the left, M's is on the right. |
M preferred to leave hers on the contrast paper as it was.
I thought it worked well. M had completed the brief, we both had acceptable woven paper designs, but M wasn't happy. She said my tree was beautiful but didn't like hers. I thought it was lovely, very Dr Seuss like and said so, but M protested that she wasn't trying to make a tree look like something out of a Dr Seuss book.
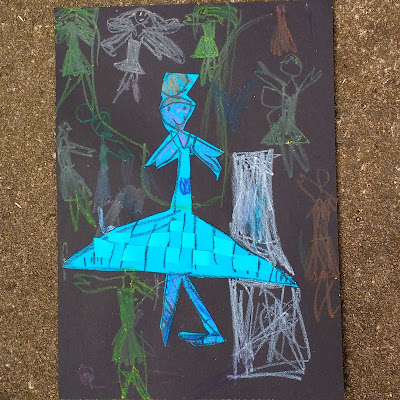
I suggested that maybe trees didn't inspire her in terms of art and that perhaps she could incorporate the weaving into another design. M's little eyes lit up and she immediately started a second picture, on a topic more to her liking.
 |
| M's ballerina with a woven tutu, complete with background figures. M elected to weave in a slightly different shade of blue. |
 |
| M's dancer. |
 |
| My goldfish. |
They work really well, love the fish
ReplyDeleteThank you. :-)
Delete