Reluctantly I bought a new phone, which naturally needed a new case to protect it while in my bag.
Rather than buy a cheap plastic case, I decided to make one and chose some left over Peaches & Creme cotton to do so.
After looking through my stitch dictionaries and crocheting a few swatches, I decided I'd try alternate 'shallow crochet'.
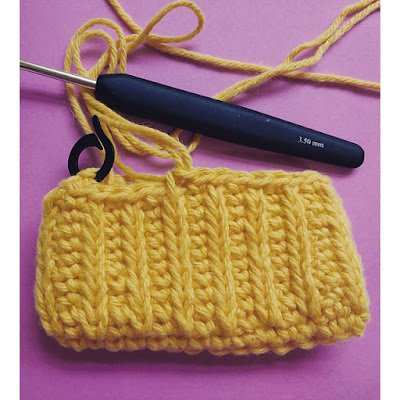
Shallow crochet stitches are spiked double crochet, i.e. worked into the top of the stitch on the row below the current working row. I wanted to work tightly, but a swatch of pure shallow stitches was too stiff and very hard on the hands. I elected for the alternate stitches instead which produces a firm fabric with vertical stripes of 'V's which look a bit like knitted stitches.
To keep my phone safe from the many things I carry around, I wanted this to be fairly tightly as a piece so decided to work with a 3.5mm hook. I highly recommend a pointy tip, as the shallow stitch is firm, making it difficult to get the hook into.
I worked 30 dc in the round, starting with 15 foundation-dc, then turning and working 15 stitches into the base of the 15 fdc I'd just made.
 |
| Alternating shallow crochet stitches. |
After that, I started working alternate shallow dc stitches with normal dc in the round to give the ribbed effect.
It is a bit tricky picking up the loops of the previous row, but following the the strands of the base of the dc you'd normally be working into helps. The shallow stitch will result in a 'V'; in subsequent rows, aim your hook just above the point where the 'V' makes a point. If you look at the back of the work, you should see the hook come out just below the back loop two rows down.
Keep working in the round until the phone is just covered, then finish with a row of dc and then a row of crab stitch (reverse dc). I added a loop fdc half way around one side of the final crab stitch edging.
 |
| All finished, with a button added. |
 |
| All finished. |
 |
| Ready to keep my phone safe. |
(As always, I am using British crochet terms.)
No comments:
Post a Comment